Tag Line

"Built Dam Strong!"
Showing posts with label collector. Show all posts

22 May 2012

DOHC ZC flanges, tri-y headers and some good tips for V-band flanges

I thought I would grab some detail pics of the DOHC ZC flanges I got in!

Here is one on top of the C-channel piece I got to do header fab from:


Laser precision!


Once the header gets made, I will flap wheel those marks out and smooth it up, and given how nice they are, it shouldn't take long at all!

Today I got a lot done, though I had to take a huge step back because of a glaring mistake I made, but I definitely made the best out of the situation and am really stoked about the next few days!

Here's the tubes for the smaller of the two 4-2-1 headers you may have seen in the background of some of my pics:

I had just finished sanding them. I wanted to attempt to get into the "crotch" of the first 2-1 merges, but, as you can see . . . that wasn't gonna happen:


Welp, it's only metal. Time to cut and paste!


I then took the time to wire wheel the whole setup. The pieces came out really good looking!


This is a weld from when I welded the merges into the whole collector:


I love the way brushed steel looks!

This is an process photo of setting up my ghetto rigged welding "table:"


Yes, that is a half a door with a stainless shelf I liberated from a recycle pile. I clamp my ground lead to the shelf and it provides a really decent ground for anything placed on top. I use a wire wheel to break up the oxides on the surface a bit each time I use it, and that really does help make better electrical contact. 

Enough talking, more welding!

Here is the start of welding up the v-band onto the tail of the collector:

You'll want to note that I actually extend the pipe through the collector a bit:


(More on why in a few more pics.)

Best part of the weld on the v-band:

Inside the pipe, yes, that was cleaned up afterward:


Now here's the flange without the other half on.


Welding the v-band flange like that does a few things for you:
1. Self-indexing connections are easier to put together by yourself.
2. The connection will seal better, as there is no split at the joint of the flanges.
3. Welding with the whole v-band assembly together helps prevent warpage. 

Overall, this is a much better way to do things as long as you have the extra space to do so. Just make sure you leave enough of the other side's flange to get a good weld onto the exhaust tube. 

Next, I welded up the "crotches" of the primary merges:


Then, to correct for lack of proper equipment, I welded on slip-fit rings onto the primary merge legs

Mockup:


(Note, the sanded portions of the slip fit rings! ALWAYS clean your metal. ALWAYS)

Getting things started off RIGHT!


Still have a lot to learn about welding this stuff, but I am definitely getting better. 


After the slip fit rings were welded on, it was time to re-weld the primary merges to the rest of the collector. I chose to gap these welds, and used my handy-dandy body panel clams to space everything correctly:


DONE! 


I love the way that thing looks. 
Here's a closeup of the welds in the middle:

A friend of mine who is a very excellent welder told me to try using thinner filler. I will certainly do that. I'll also try a few other techniques for joining this thin tube that he mentioned. (Thanks, Remo!)

Now that the collector is 99% done (there is actually some porosity in one of the welds that I am going to cut out and weld over. I have no idea WTF caused it, but it might just be an odd spot in the metal which happens on occasion), It's mockup time!


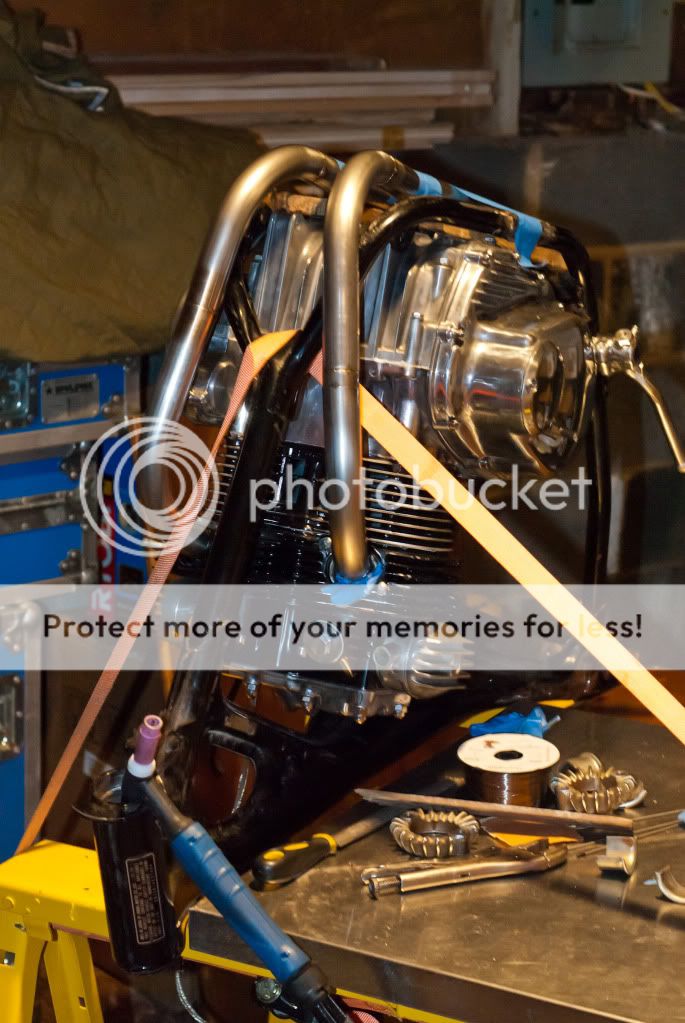
The collector is easy to hang by itself, but when you add this stuff:


It gets a lot harder to manage by one's self. 

Another view on the ground:


In place, sort of:


This being my first completely from scratch header build, I have run into some issues. LOL! Since I cut the collector apart, my primary tubes are a bit off, as you can see in the next two pics:


The simple solution for that is to cut and past, again. heh The problem is that I need to get the collector in place first and it needs to be on something solid. I will have to build a fixture for it in order to keep everything where it needs to be. My primary concerns are getting as close to the oil pan as practical to maximize ground clearance, and to make sure that the header ends in a spot that will actually fit in a car.
I oopsed that with Justin's headers, because he wanted it tucked TIGHT to the pan, and I ran it straight back from the corner of the pan instead of the middle of the pan, which lines up better with the center tunnel of the car.

Whew . . . what a long post. It was totally worth it. I really enjoyed cleaning up after today. The next header I build in the coming days and the battery tray and seat pan I am going to fabricate are going to push me to new levels of pickiness. I just want to make sure the people I am doing work for are satisfied with it! I always want to do the best job possible.

13 January 2012

The past two days have been weird, busy, crazy with some fun thrown in.

Firstly, my DD, a 93 Acura Legend L coupe, AKA parking target (Driver's side has serious battle scars from people who can't )(#(*$$ park) decided it would like to nearly self destruct. I was picking my mother up from work in the late afternoon on Thursday. On the way back, the engine just looses all power. It barely wants to run. Being close to home, I just nurse it back to the house. Along the last few minutes of the trip, my mother and I smell a rather nasty stench coming from my car. I pull into the driveway and park, starting my investigation by looking underneath, and I was greeted by a site I would prefer not to see on any DD car: the entire midpipe glowing bright, ready to melt orange. (*#&$! The cat puked its guts and clogged. I'll add that to the )(#$(#$ list of stuff to get done before Tuesday. (Classes start next Tuesday.)

Anywa, I am going to gank some pics from Dave, who's motorcycle I am building a header for, along with some other stuff to get it running. The hard parts are already done. Anyway, here are some pics that I've borrowed from Dave until he sends me his copies for my own purposes.


Upside down motorcycle! I am glad we mounted it this way. Everything is soo much easier to mock up when it is in plain view like this.

The collector position was decided and then everything else just started to flow:


Warning, hot beaver action ahead! Look away if you are faint of heart!


And here are a couple of crap cell phone pics from Thursday as I was prepping for heading out to the "shop" for work:

Runners marked up and ready for tacking:

The shorter pair on top are actually the 1-2 runners. They match almost perfectly in length. The longer pair are the 3-4 runners. Again, they match nicely. If I wanted to make the pipes closer in length, I could run the 3-4 pair to the upper legs of the collector and the 1-2 pair to the lower legs of the collector. I'm OK with a mis-match. This is all about experimeting! 

Now here is a picture that is really terrible and needs some explaining. 


This is looking through one of the runners on the collector, and the bright bit at the end you see is a lightbulb that I was aiming the thing out. You can see all the way out to the end of the collector! THAT is good for flow. =)


08 January 2012

Monster update to bring my personal header project up to date.

So, this is going to be a ridiculous update. I am hoping to finish this project by the end of this week. What you are going to see is something really different to the Honda (car) guys are used to seeing. The motorcycle guys are used to seeing megaphones and whatnot, but maybe not some of the other stuff that I'm incorporating into these headers. 
Stack of awesome bends, transitions and cones from Columbia River Mandrel Bending:


If you EVER need bends, then buy them from CRMB. They are exactly consistent, well priced and have EXCELLENT customer service. 

Here's my cheap but actually trusty band saw: 


I like it. It's not as nice as the Milwaukee I would prefer to have, but . . . At $65 shipped, this gets the job done incredibly well. 

Capturing the scale of these parts is difficult without a frame of reference. 


The first order of business was to flap-wheel the bead left from the weld on the cones, which looks something like this:


Here I am getting the reverse (convergent) cone marked for cutting:


Here it is marked up and ready to get chopped:


Here is the setup I came up with for clamping, which worked very well:

Fit-up is pretty effing good:


That's all I needed to do for the larger megaphone. The smaller one, which is more "normal" sized needed some trimming to fit, so, here are some pics of that:


And here's a pic of the megaphone set up to see how it will look with the 2.5" tube that will get a V-band to fit the rest of the rest of the exhaust: 


Now, for some perspective and scale:


Yeah . . . the large one is insane. I wanted to go )(#*$(*#$ huge to see WTF happens. I don't think anyone has ever used one this large on a Civic or CRX. I want to see what happens. Megaphones are proven to work, so, I figure go to the extreme with one and see what happens. If it doesn't work, I can easily cut it down in increments. =)

"Bench" cleanup time:


Now we get into some of the more creative. Taking the 18* bends and making a 2-1 collector that is both precise and consistent isn't terribly easy without a shop full the proper tools, so . . . I made molds. I spaced the bends using wood spacers and using clear tape over the end of the tubes. 

Here are the molds for the two sizes of tubing I am using:


Here's the taped end I used to make the mold:


 I simply used packing tape over the end of the tube, cement in a chinese food container and time. Once the mold was dry, I just plopped the other bends into the mold, sprayed them with cheap spray paint, thanks to my friend Jesse's brilliant idea, then cut them.


 I didn't get a lot of pics of the in between stages. I got all the beds cut up, got a TIG welder, got that set up in a friend's garage (I don't have 220V access at home) and got to welding.


 Here are most of the collectors welded up:

Some closeups of the welds on the collectors:


Inside:


Not pretty, but, honestly, not bad for my first TIG work on thin metal. It cleaned up nicely enough with a die grinder. Also, not the exact fitment in the "crotch."


Keep in mind, these are the first TIG welds I laid down in YEARS. Every time I sit down to it, I get better, more comes back, I get into the rhythm faster. I'm near ready to tackle some stainless. I'm looking forward to it. 
The next step was to take the collectors and match them up to the size they need to be, thusly:

A crack developed when sizing the ends:


I'm not worried about it because I have a TIG welder. heh

I also managed to break my cheap exhaust expander trying to expand stuff. 


I was seriously pissed. There don't seem to be and good solutions for this, either.  I bought a heavier duty expander, but . . . it won't fit in the smaller tubes. I'm using 1 5/8" OD. 

This is the fit I am looking for:


Keep in mind . . . this is JUST the collector. heh heh heh


Unt Hello! Here's the collectors 90% finished: 


HUUUUUUGE! 

OH YEAH!