Tag Line

"Built Dam Strong!"
Showing posts with label Pete's manifold. Show all posts

16 March 2014

Pete's Turbo Manifold: More progress, finally.

After much too long a hiatus, I got back to welding up Pete's twin scroll manifold. I made pretty significant progress, especially thanks to being able to use a lathe!

Of course, pics are the thing you come for, right?

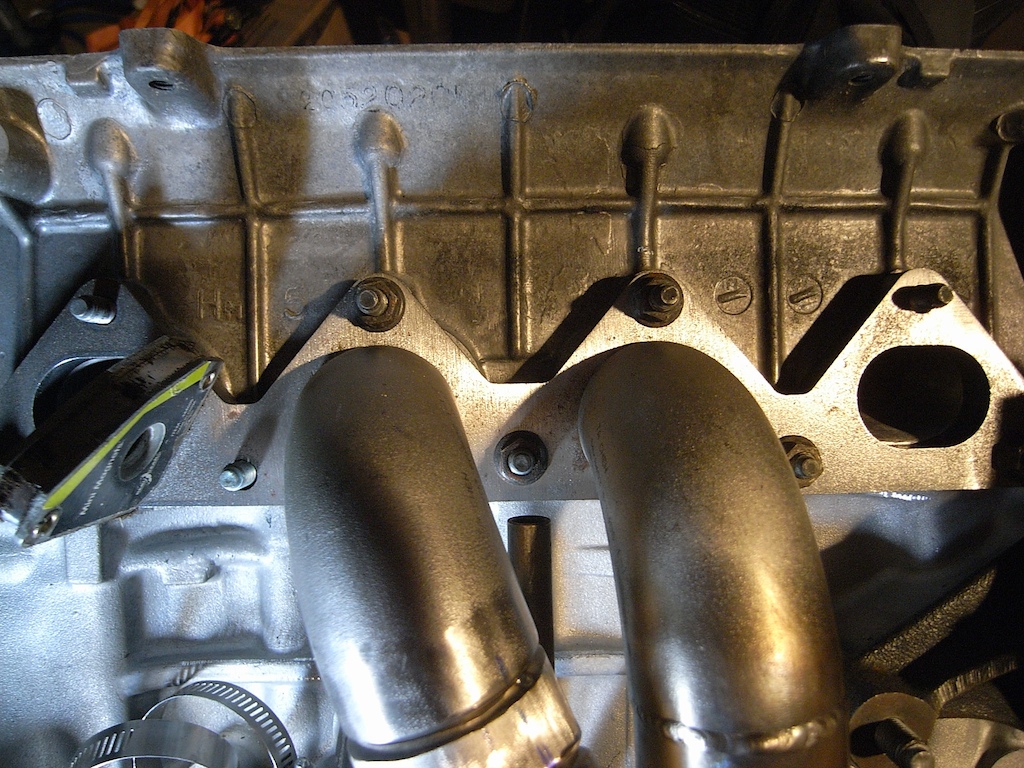
On thing I see on some manifolds is poor access to the flange nuts. If you're making something yourself, why make things hard to get to? How do you figure out how much space you need? Simple. Use a tool as a spacer:
 Once that was figured out, I got the pipes lined up on the flange and started welding them together:

I finally got to use the torch a friend sent me to try out:
 It's different. I'm not sure if I like it yet. It works. I'll keep using it.

Now for something totally cool! My friend recently acquired a new South Bend Heavy 10 lathe. Seriously. New. New as in it had the original cosmoline packing grease on everything and he had to put it together himself! If you don't know about these lathes, they are one of the most desirable classic benchtop lathes, and after using it, I can see why. I'm really surprised by the quality of work it can do for being such a compact machine!

Anyway, my friend turned a chamfer on some straight sections of pipe while I cut stuff:
 Look at how nicely that matches the 90* fitting!!!!

Got everything tacked up:


I started welding the straight pipe to the bend:
 I'm getting some advice from my friend who sent me the torch I'm using. Stainless is a pain to weld, and I find this thicker stuff tricky. I love learning this stuff, though!

Here's how I'm figuring this should go together:


 I made the straight sections a bit too tall, though, so those will need to get trimmed down. This manifold is going in a 1G CRX. It has very little room in front of the engine, so I am trying to make this whole thing as compact as possible while still being a decently flowing manifold as the power goals for the built are 500+WHP.

I'm looking forward to moving this along. I really enjoyed

29 August 2012

Running out of gas is not usually a problem I face.


Being lactose intolerant with an inherent love of dairy ensures that. But, today, I ran out of Argon. So, tomorrow or Friday I will have to make a trip to my LWS (Local Welding Supply, or in my case, not so local, or even open on Saturdays anymore . . . grrrrr . . . ) and exchange my 300CFH bottle.

Running out of Argon should imply that I was welding a lot. I was!

Today's goal was to completely weld up the other runner of the "inner" section of he manifold, so I got crackin'!

First up, taper the joint that I had cut in the 45* el, as started out just plain flat:


After that, it was time to finish up the inside of the other runner since it is way easier to do that when you don't have things in the way! Setting up the purge:


Section to be welded:

My friend Remo sent me some tape he has used:


This stuff RAWKS! It is way better than the other foil tape I was using before. I'll get into it more shortly.

I also decided to first fuse the pieces together:


And then run a cover pass:

I think it turned out pretty well.

The next bit of work involved more fitup. I couldn't take pics as I needed all available limbs and appendages to get things lined up and marked, but, I finally did that and started tacking:


After more cleaning and tacking and cleaning and tacking and purging and cleaning and tacking, etc., I check the fitment:
 Caching!

I took the next picture to point something out:

Keen observers will notice that the pipe and el are slightly different diameters and that the el is offset towards the right in the picture. While this might not "look right" from the outside, the inside is the part that matters. Gasses/fluid will "stack" on the outside of turn, and it is always best to keep the outside of turns as smooth as possible to eliminate as much friction and turbulence as possible.

Fusing!


I also took the time to "graduate" to a shorty cap since I will be getting into more complicated stuff soon enough. I don't like short caps because you have to "waste" tungsten by chopping them roughly in half, which increases costs and uses up more of the tungsten more quickly.


Now, here's the reason why I like the EZTape:

NO RESIDUE, even after welding for a while on the thing and it being darn hot.

Internal shot as best as I could, though it is not focused on the right spot:


External pics of the fusion welds:


Closeup:


Now, a note about purging. Argon is heavier than oxygen. Typically, you want to introduce the argon into the enclosed space so that it sinks to the lowest part of the interior of the weldment and then "floods" the weldment until all the oxygen is "floated out." In order to do that, you need to allow the oxygen to escape. Note the holes:

Since I wanted to make sure that all the oxygen was displaced from the runner I was welding on, I made sure to allow the argon to flow through that runner the most.

The holes also allow excess pressure to vent. If you get your weld hot enough and don't vent the pressure, the hot, molten metal will be forced out of the puddle from the inside, sometimes explosively. Having hot metal spewed at you is NOT fun. (I have the scars to prove it.)

After I fused the pieces together, I started capping them. I didn't do a perfect job mostly do to the fact that I need thicker filler rod that doesn't melt back from the puddle so quickly and it threw my timing off something fierce. No excuses, though. I'll have to run another cap pass to fill in the undercut:


Another inside shot:

Even with all that heat, no "sugaring" at all! 

17 August 2012

Pete's Manifold: Slow and steady!

Yesterday, I got the first cut made. Today, I got the start of runners #2 and 3 mostly done. 

A lovely package came, too. In it was more laser cut flange goodness!


Those are the entry flanges that conform to the T3 twin scroll "standard" from Garrett. I have yet to fit them up to see how exact they are, and as with anything like this, there will need to be some adjusting for everything to fit perfectly together, but they honestly look darn close. Chris, who does this for me does excellent work. If you need flanges done, hit me up and I'll give you his contact info!

So, here's what happened with the pieces I cut yesterday:

I found some really useful hose clamps at Pep Boys when I was shopping for Chrysler crap:

 They are made by Ideal, and yes, they aren't as cheap as normal hose clamps, but, when you don't have to use a tool to tighten them up, they sure are more convenient to use.

I started cutting the straight pipe for the runners:

 The angles look funny because nothing is sitting correctly since I haven't cut he straight section from #3 to fit onto the runner from #2. This is a nice, low angle merge that will flow well and create very little turbulence. Now cutting and shaping that straight leg to fit is going to be monstrously hard to do with the tools I have, but, I will certainly make it happen.

I am going to finish mocking up the #2 and 3 merge and upturn before I handle #1 and 4. Notice the pairing of 2-3 and 1-4. This is the correct way to merge a twin scroll setup, with exhaust pulses 180* off, basically out of phase. When coupled with a twin- or divided-scroll housing on a turbo, this allows for a much more efficient system that will spool faster and allow wilder cam profiles since there is a significant and beneficial increase in the pressure ratio between the intake side and exhaust side of the engine. This is very important since the turbine wheel forms a huge restriction. Nearly anything that can be done to increase the pressure ratio by lowering the exhaust pressure is a very good thing since it allows the engine to breath in more clean, compressed air/fuel mixture, much like a properly built and tuned header. Hmmmmm . . . I wonder where those ideas came from? heh