It LIIIIIVES!
Justin finally got some revving on camera! Skip to 1:20 for the good stuff:
The "Bisi Beaver" header bouncing off the launch control
It sounds like it hit puberty! heh
I don't think I've heard another Honda 4 cylinder with that much of a baritone to it. I like it a lot!
Showing posts with label 4-1 collector. Show all posts
Showing posts with label 4-1 collector. Show all posts
27 March 2012
26 March 2012
Justin's "Bisi Beaver" beader. (His name, not mine, if there are any lawyers reading this.)
And now for something that is a total tease, because Justin is a goober:
Justin's "Bisi Beaver" header idling. And nothing else. Because he sucks at video. LOL!
Justin apologizes for the sucky video. He thought he had revved it on camera, but didn't. He will get a better video tomorrow, so check back in the evening tomorrow.
Justin also reports that so far, it sounds completely different (It sounds quiet in the video because his phone sucks) and that the throttle response is "mega better!" so far. Mega better. Yeah. I like the sound of that.
17 March 2012
Justin's header is nearly complete!
Lots of pics. I am beat. I will add in filler that most people don't read later. Pics.
Promised filler!
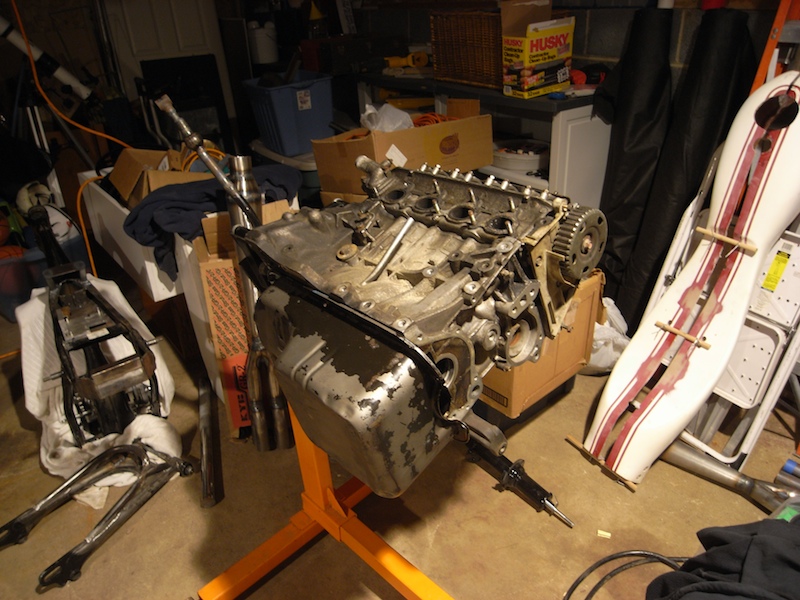
Here is my A6 block, head and pan on a stand, which is used for mock up!


Promised filler!
Here is my A6 block, head and pan on a stand, which is used for mock up!
End view of the Bisimoto header, with the collector trimmed to near final dimensions:

I finally got a good shot of the dang goilette, however that is spelled! I really, really dislike the poor craftsmanship exhibited. Blech:

I am SURE this is like this or worse in most of the headers that have been sold. Look what less than 10 minutes with a small grinding stone did:

From another angle:

As you can see, it is much, much cleaner now. I didn't bother to take pics after I flap-wheeled everything inside and around the edges to clean up the burrs and smooth things out and clean everything up for welding on the new downpipe.
Checking fitment:

Nice and straight!

Compared to my "big" collector:

I had to come up with an easy way to hold things in place to asses the level and mark of any final trimming I needed to do to get the downpipe and the collector properly fitted up. I used some nearly useless for welding .023" 309 welding wire (way too thin for anything I will ever do, as I found out) and clamped the loop in place to keep it adjustable:


It worked very well!
Here's the downpipe fitted to the collector, held on with blue tape until I could tack it more permanently:

Round to cloverleaf? Yup, but it isn't that much of a problem as you'll see soon!

Tacked solidly in place!


Ickiest gap:

Another view and the other sides:


How does one make odd shapes fit? Beat the piss out of things!


I forgot to get pics of the welds, but you'll see them in the next blog post, which will be confusing to anyone reading my blog normally, from top down. heh
Anyway, test fitting:

Very good pan to downpipe fitment, but, the angle was off:

What to do? Use Math. Yes . . . I used math. I figured out that it was about 9* off from level (basic trig) then I did some more basic trig to figure out how much I needed to slice on a diagonal to rotate and weld the cut piece on to get it back to level. I didn't get pics of the whole process since most of it involved two hands, a knee and a magical metal fairy. I did, however, manage to lay down some much improved beads!


Now it is looking like it might be just right!

Justin needs his header ASAP, so I did a quick and dirty support using the stock exhaust hanger. Simple and effective is the name of the came:


And, showing that it is now level:

Oh. Yeah. I found my good camera, finally. It was in a really stupid place, and totally my fault. At least I can take decent pics now. Enjoy.
14 February 2012
Finally a halfway decent photo to show some progress.
I'll admit it: right now, I am better with the thick stuff than thin tubing, but, look at this:


The reverse cone is the last piece I've welded in that pic. I love this stuff!
31 January 2012
I actually got a bunch of welding done yesterday! (Justin, this pertains to YOU!)
I was going to upload these pics and write up a post last night, but I had a wicked headache and went to sleep very early and slept it off. Meh. I am mostly fine today, so, here's a quick and dirty lunchtime (PB&J with clementines!) update!
I welded up the new downpipe and the divergent and convergent cones for Justin's Bisi header that I have been working on:

I don't have many pics of the process, as it required both hands to hold things in place while tacking the pieces together, and after that, I just welded stuff. LOL!
I am finally starting to see something resembling beads that I really like:

That's as far as I got with that, but welding all the pie cuts took a good long while. I didn't grab any inside shots, not because I am afraid to show what they look like, but because I forgot. I got interrupted by helping my friend move some cabinets he sold to a dude, which frees up more space for me to work in and actually set up a little shop area. I'll eventually be able to have one section of the garage to call my own and not have to disconnect every freaking thing and then reconnecting it every time I want to set up. Hurray for eventual efficient working! It takes me over half an hour just to get things set up and ready for working. After setting up a little work shop area, I will be able to get more work done during the little time I have there. That is very precious to me!
The next thing I worked on was taking this:

Which is an Acura Integra dual ben shift lever; then doing this to it:

(That's not the same shift lever as in the first picture, but I forgot to get pics of that one after I chopped it to bits.) And then, welding the extended bits onto the stock parts, like so:

In order to make the final product look like this:

Why? Putting the shift knob closer to the steering wheel greatly reduces the time it takes to complete a shift, and increases the time the driver's hands are on the wheel. Both of these things are excellent for drivers who value the details of making the car faster and safe. It looks ridiculously long, because, well, it is. The customer asked that it be positioned to a certain height, with the bend placed a bit farther back and towards the seat. Mission accomplished.
And here is something you won't see on a lot of other people's blogs: Mistakes. I am not perfect. If other people can learn from my mistakes, then I won't feel so bad.

Look at where the feet are. Look at where the cross supports are. Yeah . . . The outside dimensions of the base for the welder are dead on to what I wanted for it. I wanted a good amount of overhang on the front and back to protect the hose and line connectors. The sides have a bit of overhang so I could make it easy to lift the welder up and out (if I need to move it) when I add some odds and ends to the sides of the cart. So, I measured the outside of the box, came up with my plan, then executed it pretty darn perfectly. But I forgot about the dang feet. In fact, I never even looked at the bottom of the welder. Dur. So, I have a couple of options. I can cut the supports out and start over, or weld in some new supports. Given limited material, I am not going to waste material and make the cart heavier by welding in new angle. I have some 1/8" strapping I could use, but, I'd rather not "waste it" on correcting a mistake. One thing that makes me pause from doing that is that if I cut the supports out, it will twist the frame. It's pretty effing square right now. (I had to learn to make things square within 1/16" while I was in the Army, or my "boss" would kill me. It pays off, for sure, since a lot of guys can't even keep things within 1/4" on small stuff.) I might just weld on some strapping and call it a day.
Another possibility is putting a plate on the top, but . . . I don't have the sheet metal, and the feet would still need support unless I go with way too heavy plate. I also don't like plates, as horizontal surfaces collect dust and dust isn't good for the insides of the welder. I prefer to keep things open, or with grating/thick mesh, as that cuts down on the cleaning you need to do. Since I've worked in super dusty environments (I will post up a pic of some sand in the air eventually), I know a few things about keeping equipment functional.
The reason why my material selection is limited is that I am using an old bed frame I got for free off of Craig's list. I love (almost) free stuff. I have to find a few more to complete the whole thing, but I have enough from one frame to get the basics of the cart made up. I also scored some free hard rubber wheels so this sucker will be rolling pretty eventually. =)
And that is my quick lunchtime update. =)
10 January 2012
Almost final mock-up of Justin's header
Justin was looking at the pics of the header and requested that I tuck it to the pan more for ground clearance. His wish is my command . . .
I took off the top two pie cuts, and started playing around with fitment, coming up with something about like this:


Then I have to figure out how to fill the gap. I took some measurements . . . and got some ugly results. heh. I booger things up. I am, occasionally human, too, ya know.

Even with it being ugly, the fit up is much more to Justin's requirements:


I don't have pics of it, but the first pie cut you see there is actually apiece from the original, largest cut in I made. It was very much larger than what was needed, so I simply cut a vertical slice out of the short side, and it fit very nicely with the rest of the downpipe and much better:

All together, it fits closer and is mostly acceptable to what I think it should do:


The one remaining serious issue to deal with is the gap on the back side:


I could, technically, just put a patch over that, but, I don't like the inherent volume increase, even on the backside. Even with the exhaust flow mostly pointed towards the outer wall, the increase in volume and the shape of it won't be ideal for flow. I'm trying to improve the situation, not regress. heh I will stare it is some more today before making the final adjustment cuts to the header.
The last issue is covering up this gap from a wonky cut and using pieces that didn't originally match up:

That is really easy with using some scrap from previous cuts!

ALMOST THERE!
Subscribe to:
Posts (Atom)