Tag Line

"Built Dam Strong!"
Showing posts with label workbench. Show all posts

30 January 2013

More Bench progress

After I finished porting the oil pump, I started pulling the sheet of steel that covered a majority of the bench so I can get down to business pulling it apart.

I started by unbolting the vise and pulling out the nails along the edge of the metal covering the bench:

I pulled the shelf off:

Aaaaaand . . . I have to admit I am mostly responsible for many of these holes:
 When I was a smaller cretin than I am now, I loved hammering in nails . . . And the bench was really convenient for that. So, yeah, I made my own life more difficult. heh

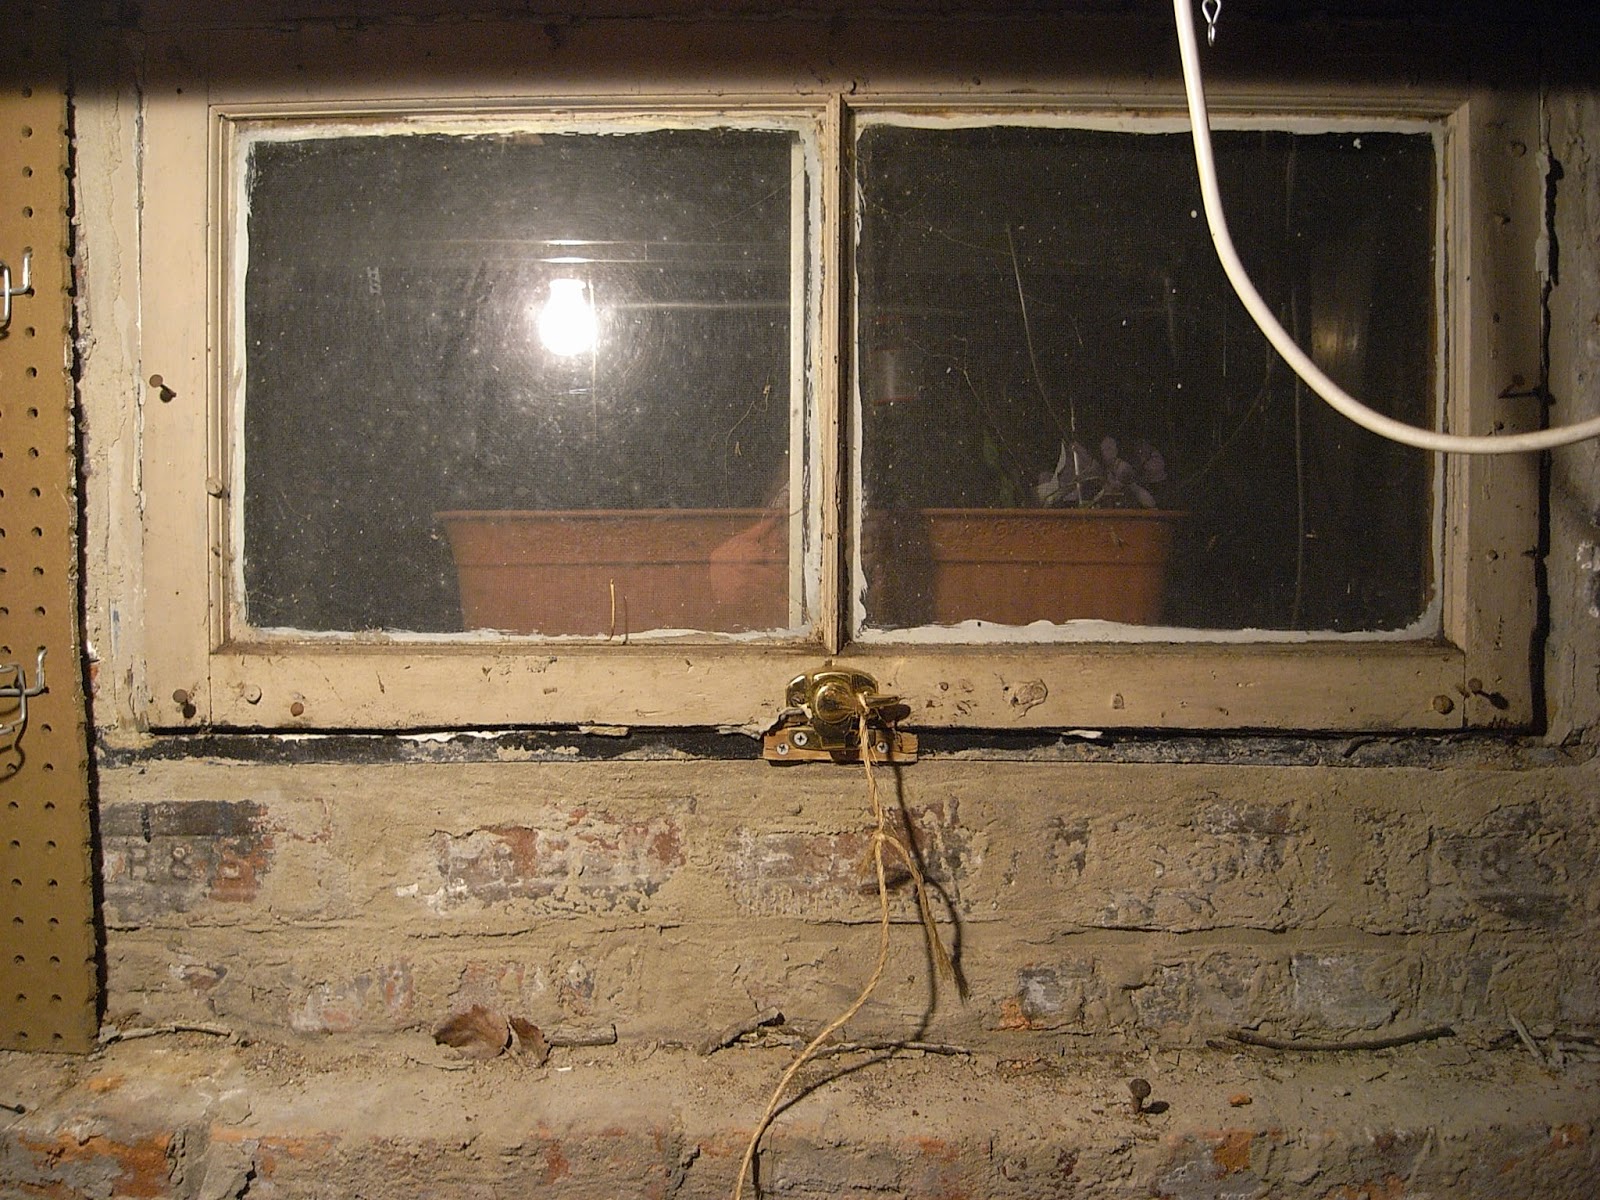
This is one of the original (as far as I can tell, or at least way before my time) windows:
There are six of these, and they do let in a good amount of light in the winter (not so much when leaves grow in during the spring), but they are starting to fall apart. I have never made a window before and I really don't like working with wood, but, I might try my hand at making some in the summer.

This is the electrical box for the house: 

 It is REALLY small, only 100A service :
 No room at the inn . . . meaning no room for wiring a welder. I also have never heard of the brand/company before (not that I know a heck of a lot about electrical stuff). This is gonna have to get addressed at some point in the near future.

More progress on pulling up the metal:

 Holes from underneath:

I actually really these pics! 


After a lot of prying and pulling and cussing and fighting with a zillion nails:
 TADA!

This is what I am going to be fighting with to get the wood planks off the top:
As to why I took the time to mostly carefully take the metal off in one piece, I have a few ideas of actually using it. I REALLY hate throwing out material. This has history in the house. Just like the bench, I'm not chucking it, but repurposing it into something that will function better for what I need, and honestly it will be a huge improvement since that bench has always puzzled me as to why it was constructed in the manner that it was.

That being said, I really don't have an exact idea of what I'm going to do with everything since I am still not sure of what I will have to work with. I know that whatever I do end up with will be more useful, allow for more and more organized storage and not cost much monetarily.

29 January 2013

Back after a long break.

Yes, I've been getting pestered about why I haven't been posting. Life happens. I've missed blogging, for sure. I am not even sure why I like it so much. Anyway, since my last post, which had nothing to do with fabrication, I've had to move my shop stuff again. Where to this time? Home. And I can't even TIG weld here (yet). So, things have gotten complicated, but there are solutions in the works for everything.

First up, let me show you what I am currently working on. It isn't fun, but something necessary. Some more background:

The family house around 135 years old, give or take a decade. I'll have some pictures to highlight that fact in a bit.

The basement is not particularly a nice place, but it has been better. The reason I mention this, in particular, is that it is where a lot of work has been done, though it usually involves me cleaning up after other people in the house. That is what this particular post will mostly be about as a prelude to the next phase in my evil plan to clean, organize and make a very un-ideal space into something much more workable.

As always, on to the pics!

This is the Northeast corner of the basement:
It is the worst corner of the basement. The floors are most uneven. It is the dampest. The foundation walls are the worst. (More on that in the future.)

Here are a few pics of the current "setup:"
;


Yeah. It's a mess. A big, horrific, annoying, messy mess of a mess.  That is supposed to be a workbench, but my father usually uses it to hold a disorganized array of disorganization.

 One of my biggest pet peeves of the whole workbench area was the dang grey metal shelves right next to the end of the workbench. It was annoying to have them there because that is right where the vise is! Holding work in the vise and trying to work around those shelves drove me batty, but I only just found a simple and easy solution to that issue: move the shelves. Yeah, it only took a decade or two to figure that out. I've never claimed to be brilliant . . . 

Anyway, I moved the small table (actually a "game table" bought over two decades ago that has a knock hockey, foosball, table tennis and a couple other games built in) next to the bench and the shelves went to where that table was, off to the right:


 That will give me plenty more space to not bash my knuckles when moving the vise and work around. As you can also see in the above pic, I started using the bureau as parts storage. I have most of one transmission and a bunch of other engine related parts in several drawers and in another drawer I have some misc. tools that I re-discovered. 

Speaking of the vise, here it is:
 I actually recorded a video of how the vise works, as I haven't seen one like this before!

I like it a lot! It is very convenient as I can move it around easily, as opposed to having to loosen a locking collar with a separate lever, turn the vise, then lock the collar in place. This is a clever and efficient design! Not bad for free, eh?

 So, once that was all situated, I started moving stuff from the bench to the shelves:


After several hours of basically stuffing similar stuff in groups on the shelves, I got the workbench mostly clear!
I haven't seen that much of the workbench surface in YEARS!

Note: That is the main breaker box for the whole house. Yeah, it IS that small . . . 

I'd now like to show you some interesting (to me at least) stuff that has been uncovered, re-discovered and actually in the first item, un-earthed:
That was sitting on top of the shelves until I moved it. Honestly, the shelves have been there for at least a couple of decades. I had to swipe off a significant buildup of crud to even attempt to photograph the label. Now if I only had some liver and fava beans . . . heh heh heh

There are several of these "knobs" from the previous knob and tube wiring in the house:

Much to the contrary of popular belief, knob and tube is pretty darn safe if you leave it alone and don't overload it. It was just when more appliances with higher current draw were added to the circuits that the wires started heating up and acting like a lightbulb filament (and consequently burning the building down). However, that isn't really the fault of the system since people just abused it. The installation for knob and tube is actually much better than modern wiring, as the wires were thoroughly soldered together and the wires were supported very well by the knobs. Heck, if you look at modern high tension lines, you'll still see the same technology at work with the ceramic isolators on the tower joints. Interesting, I think.

This is probably my favorite pic of the whole evening:
  
 I think that belt has been there since I can remember, so probably about 3 decades or more. I have no idea what it is for. I'm leaving it there. =) 

Here is one of the original cast iron vent grates and an ice pick:

 The vent is HEAVY!

It still works perfectly, though, after five or so decades!
The house was originally heated by the main fireplace, but was converted to oil fired forced hot air sometime in the 60s, IIRC, or possibly even earlier. Before I remember it was then converted natural gas. There is a coal room, hidden away, too, so at one point the house was heated by coal. Gosh, that means it has utilized every major form of heating available in this area! I never thought about that before.

13 October 2012

Finished the third workbench!

Today was a darned productive day. Here is the highlight of today's work!

I finished the middle support section of the worktable and then flipped the top upright to start assembling the base: 


I had to make this spacer to spread the legs to the correct distance:


After taking things apart and fiddling for a while, I manages to make everything line up pretty darn well:


A little while later, I screwed on the top:

And yes, I pre-drilled every single hole on the whole top:


That was a lot of screwing. LOL!

Wait! Where did it go?

Oh! Here it is:

It will take me some time for me to figure out exactly where to put everything, but I think the basic layout you see of the four machines will stay about the same.

It is finally starting to look organized and not like a completely cluttered mess!


Just a few more things and I'll finally be able to "settle" a bit and not have to freak out trying to find stuff. I love it!

23 September 2012

Finished the second workbench and moved a lot of stuff around. Again.

Here's the second bench in place:

The second bench came together a LOT better. I improved on the square and plumb of the thing, and there are no gaps or anything with this one. One of the reasons why this one turned out better was that I  pre-drilled all the holes before screwing the pieces together, making sure that everything didn't pull all crazy when I put the screws in.

You may also notice that my tool box is next to the bench after I removed the upper cabinets. That should be it's permanent home.

Here's the other side after we cleaned along the wall:


Along the back wall:
The monstrous workbench that was there (with the mini-motorcycle on it) was broken down as it was too tall, too wide and blasted together with too many big framing nails.

I moved most of my stuff from the right side of the garage to the work benches:


Cleaning up the rest of the stuff:


Moving sucks, but at least we're making progress!

Due to some oopsing on my part due to a material change (getting 16' 2x4s instead of 8' or 10' sections), we have more than enough leftover 2x4s to make a third bench, though I will take a few inches off the height since I will be mounting my bandsaw stand, sander and other tools, so the working height of the bench needs to be lower to get the work at the right level. 

19 September 2012

Workbench Wackiness

Taking a pile of lumber and turning it into something useful is NOT my forte. My design has been criticized. Just wait until the execution is seen. LOL!

I set up a work station using one of the top sheets of plywood and some saw horses:


I pulled up the drawing on SketchUp:

And started cutting:
I marked everything "WB1" and "WB2" for the work bench 1 and 2.

Many much more cuts:

Notching the support beams:

Starting assembly:

Frame mostly intact:

Got the top sheet on:

. . . with a gap:

It's not perfect, but, honestly, I really don't like working with wood, so I think this is pretty good for a first time building something. I've already got stuff figured out how to make it nicer for the next workbench that will get finished up tomorrow.

Here it is in place:


Anthony grabbed my vise and sat it on the corner saying, "NOW it is a workbench." heh

I don't think that the vise will go there, but we'll see. heh


One less than ideal thing about the garage is water infiltration:


We just have to be careful what goes on the floors. I want to see what is driving the water coming in. Anthony said it is only rain AND wind that seems to cause issues, but I'll take dealing with this over not having a work space. heh