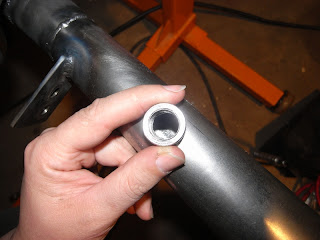
Here it is opened up to 3/8":
I used the bun to trace out how much it needed to be opened up, and it was a bit off from vertical:
I used my hanging grinder and an 1/8" carbide cutter to open up the hole thusly:
Looking good!
I happen to love this clamp! It isn't cheap, but it is very versatile, as it has swivel pads and is tension adjustable, so it will clamp down on anything from the thinnest sheet to up to about 4"!
http://www.lockjawpliers.com/ They are built very, very well. Better than real Vise-grips and faster to use. (Don't get me wrong, I still have and still love Vise-grips, but these things are just that much better!)
Here's the bung welded on:
And here is the finished product in all it's glory:
I had forgotten to get pics of the rest of the collector to downpipe welds:
I actually didn't like how the SS of the original header was welding. I just did the best I could. The good thing is that Justin isn't going to be driving this on the street anymore, and with the new support, I don't think there will be any cracking issues, at least where I welded on the header. heh
I'm getting better, but, still have consistency issues that I have nearly figured out:
Really concentrating on what was going on, I discovered that I am simply not rotating the torch enough. On small diameter pipe, the motion needed to keep the weld puddle consistent seems REALLY exaggerated, but it isn't. Once I realized that, my welds immediately became more consistent and regular. I will be using these techniques on my next several manifolds.
Now, how does one ship something so dang funky? Creatively and carefully. I wasn't going to find a normal rectangular box that would just work, so I made my own from Ikea desk box halves.
Here's the bottom piece, and me trying to figure out how best to do this:
I figured that my best bet was a clam-shell case, so, I started taping in foam supports to keep the header of the sides of the box and to keep it from pocking through, and also bent and taped the remainder of the box up in the back to make part of the tall side:
I stuffed in more packing to keep things in place in case of the worst disaster (I KNOW how "stuff-chuckers" work!):
Then I basically did the same thing for the top, and got it all connected and taped up:
I added sides to the box and then scribbled "THIS SIDE UP" on the top, and a few snarky comments on the rest of the box:
The lady at the FedEx office got a total kick out of the box and the attempt to have the box stay upright. She even had me plaster the box with "THIS SIDE UP" stickers that were bright read. She was laughing the whole time at my snarky asides on the box, and even offered to use some really wide packing tape to reinforce the corners, since she really liked the box. She also said that since it was a bit awkward and out of the ordinary (most of the weight is on the wide side), along with the placement of the address sticker and the "THIS SIDE UP" stickers, she thinks it has a good chance of getting to Colorado intact. We shall see . . . If the worst case happens, I declared a value of $499, which is more than enough to make a new header from scratch . . . (I'm sneaky like that).


That last paragraph is classic!
ReplyDeleteLOL! I'm glad you think so.
ReplyDelete