In today's way overdue episode, little Timmy gets lost in a cave and gets eaten by displaced bridge tolls and Lassie is sad. WTF does this have to do with this blog? Well, nothing. So, lets get to things that you actually want to see.
Back to mounting the lexan windshield!
Here are the mounting tabs and mandatory straps:

It's just 1/8" aluminum with holes drilled in the ends:

The lower edge of the windshield needs more support, so, I bent some tabs to support the lower edge of the windshield at the appropriate depth and angle:

Instead of fumbling around with lots of little parts trying to stack them, the thicker squares are simply glued onto the strapping:

I really like that glue! It is a gel, so it doesn't run as much and has a light blue tint so you can see where the heck it gets applied. There will be more on how the windshield is actually mounted a bit later.
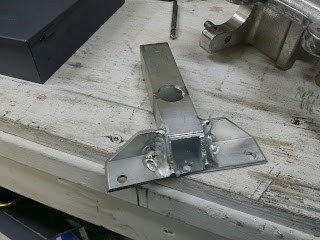
Next up we have the bracket for the dual Tilton master cylinders:
 I was told that this bracket isn't in production anymore. It's a pretty good piece, so I am not sure why it wouldn't be. Maybe there is an improved one that is lighter or stiffer or, dare I say it, more expensive. heh Anyway, this is what was decided to install in the car, so I conceptualized a mount that would fit, provide support for the bracket and would also keep everything as accessible as possible. First up is the top bar that will tie in to the two holes on the top of the bracket:
 I measured and marked the necessary hole and then started laying out how to cut the angle on the side to have access to the front bolt:

This should help explain what I was thinking:
 The big hole is large enough to slide in a cap head bolt and the front angled cut allows the same access for the front bolt. The piece is long enough to reach the backing plate that will be welded on later.
Simple angle wings reach the other holes in the front:

Test fitting is always important, especially when you find corrosion that needs to be cleaned up:
 There was a lot of crud in that one hole! It is always good practice to chase threads on projects, especially race care projects. You NEED to know things will work 100% of the time. Clean threads helps assure that.
Here's the top part being mocked up:


I like it!
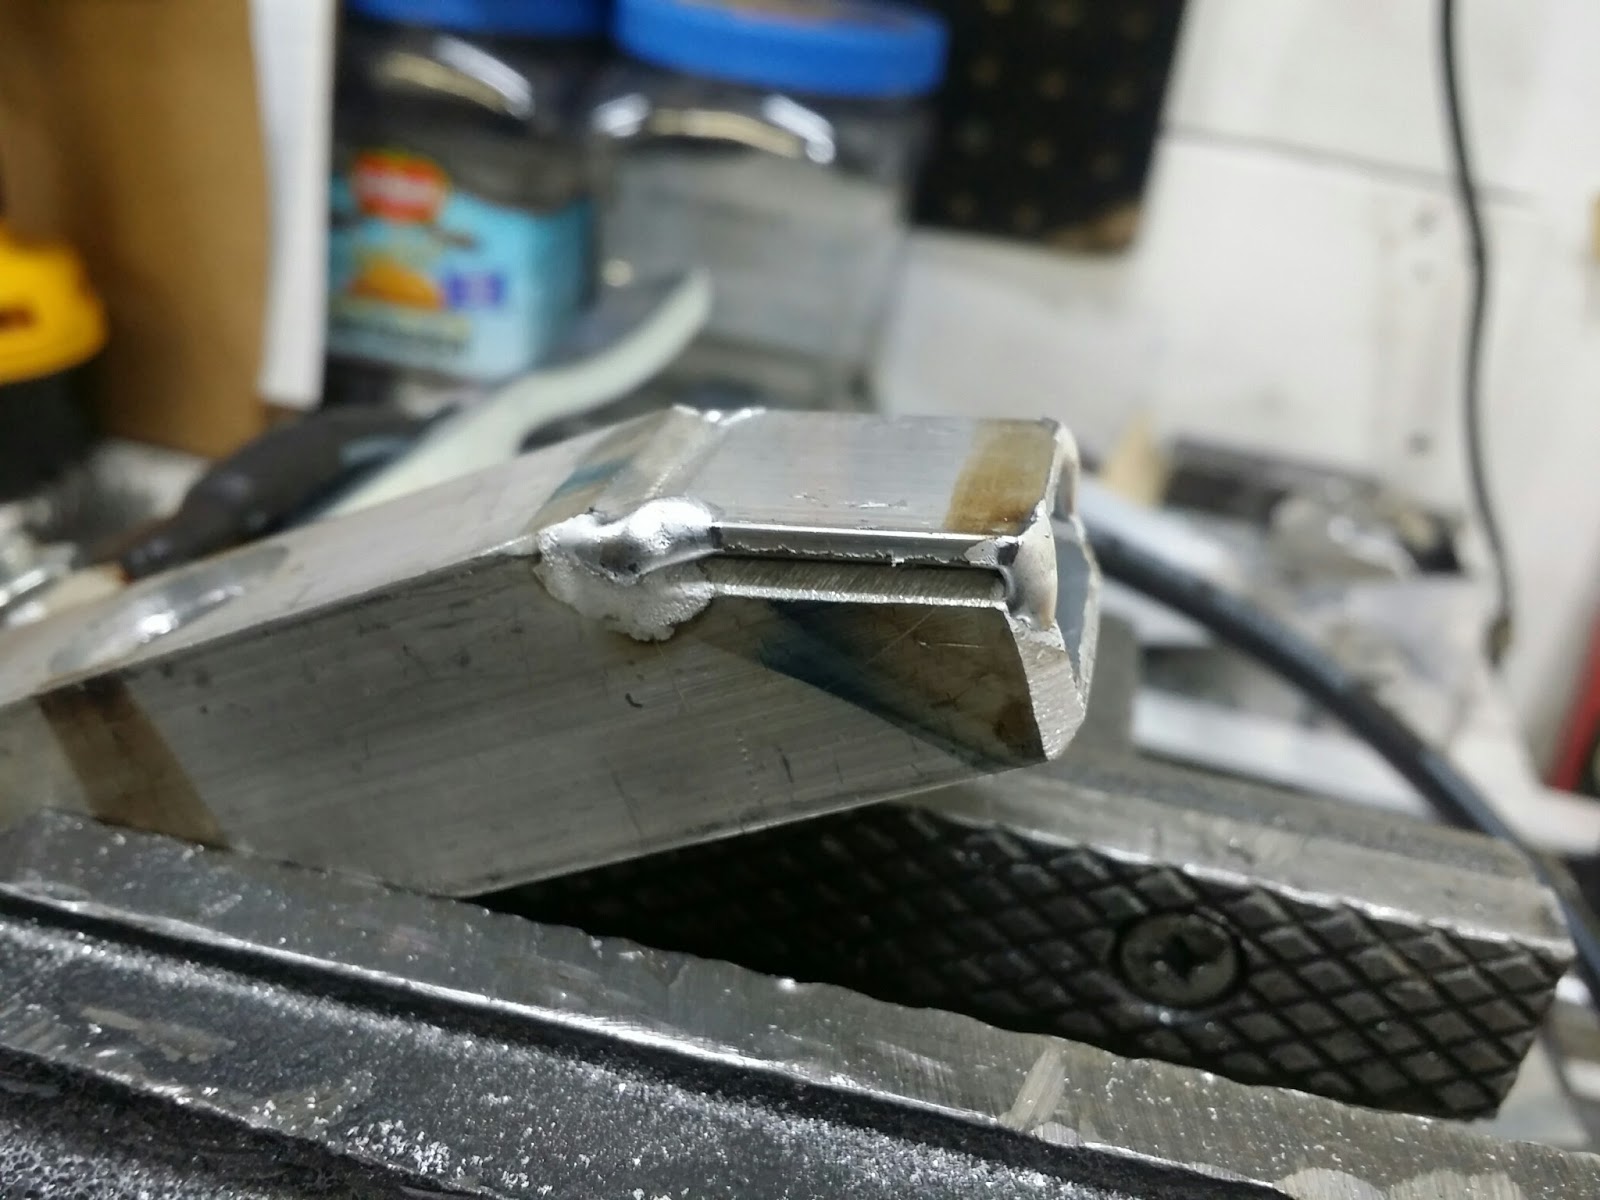
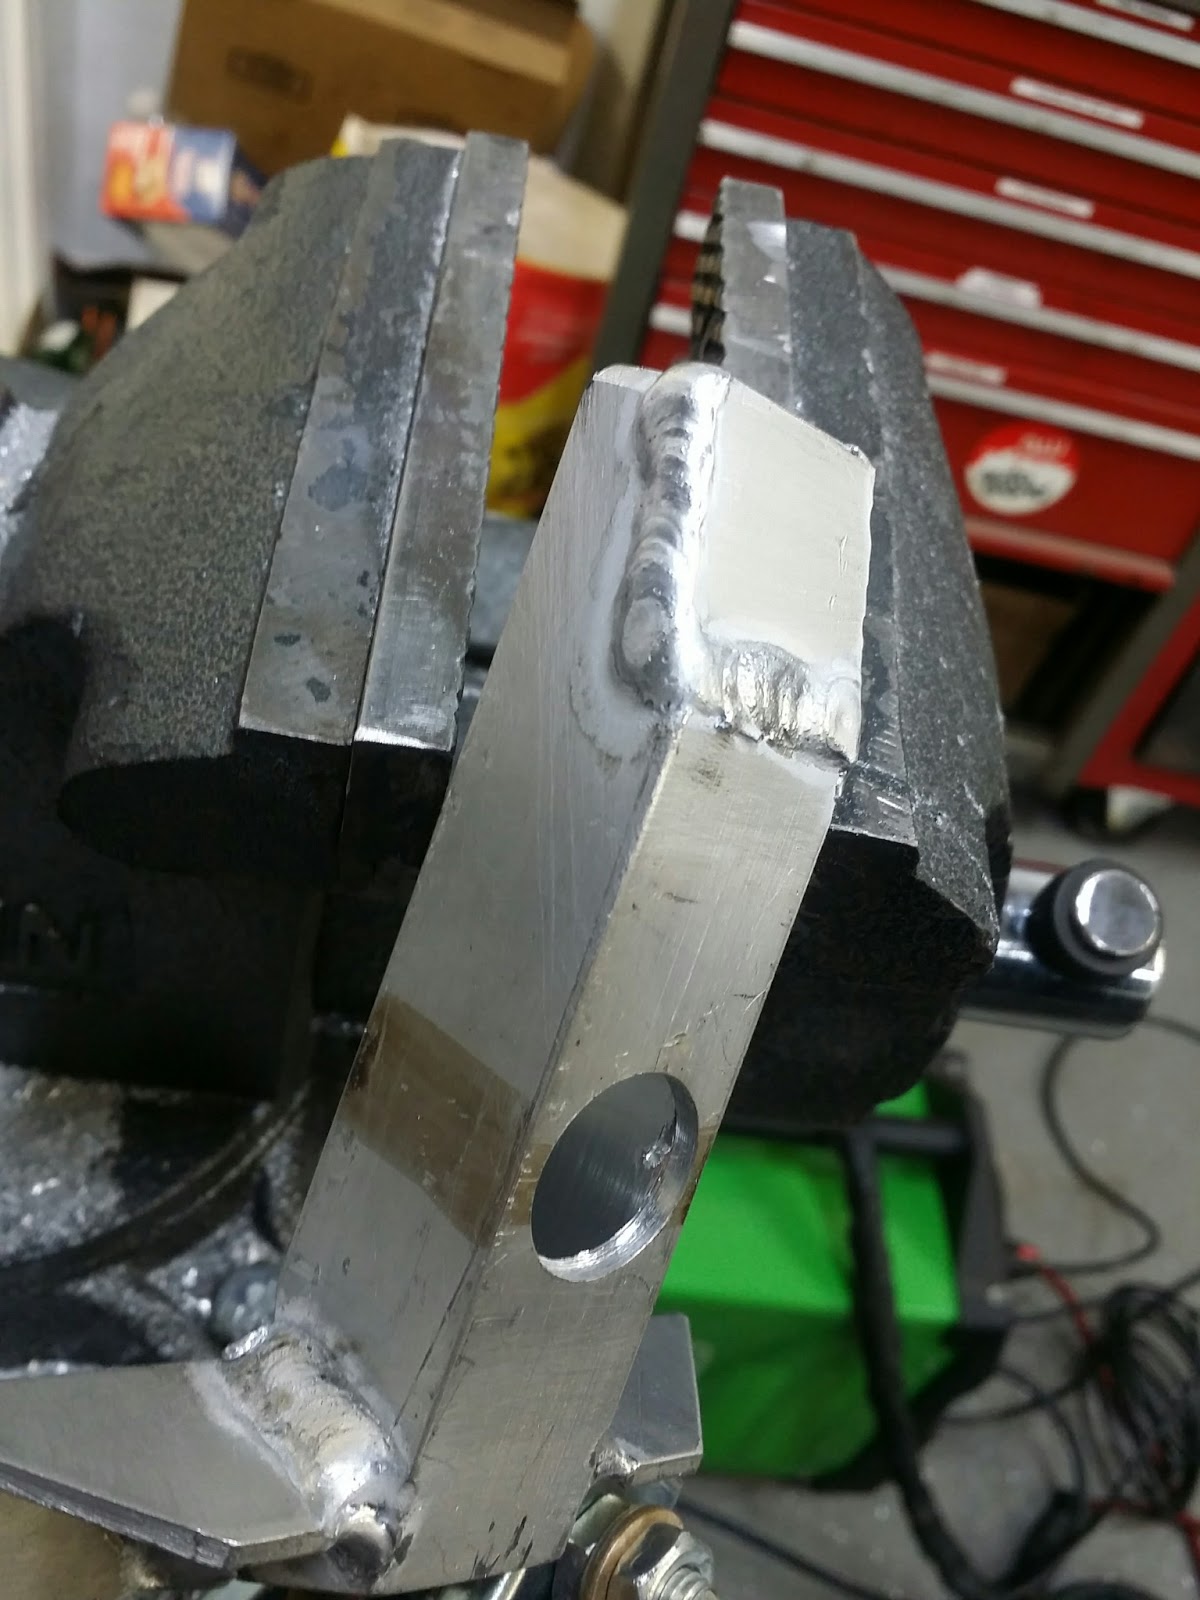
Here's the top part welded up:
 No, those aren't the prettiest welds, but, well, they work.
On to the tying in the bottom mount points with some heavier angle:
 Oops! Corner clearance is definitely important!
It is easy enough to find something to scribe a radius on to the corner and then nip the corner off to the line:

Here's a view of the bottom

Consistent layout is important and takes some practice, but you can achieve excellent results being mindful of how you do things:

Next up is figuring out just how to run the throttle cable here:

With this cage bar in the way:

Now with some TV magic, BAM!

I got it to fit rather handily with some time applying a flap wheel to the cable flange:

While I was working on the front of the car, Ed was busy working on the rear window:

I really like how clean these Quicklatch fasteners install:
 But, in practice we has some issues with them releasing. More on that in the future. heh
Back to the master cylinder bracket! The clevis adapter that Tilton sent didn't quite fit:
 I eventually drilled and tapped it for the thread on the bellcrank, That took a while since I thought I lost it, but it turns out I stuck it in my pocket for safe keeping. DUH!
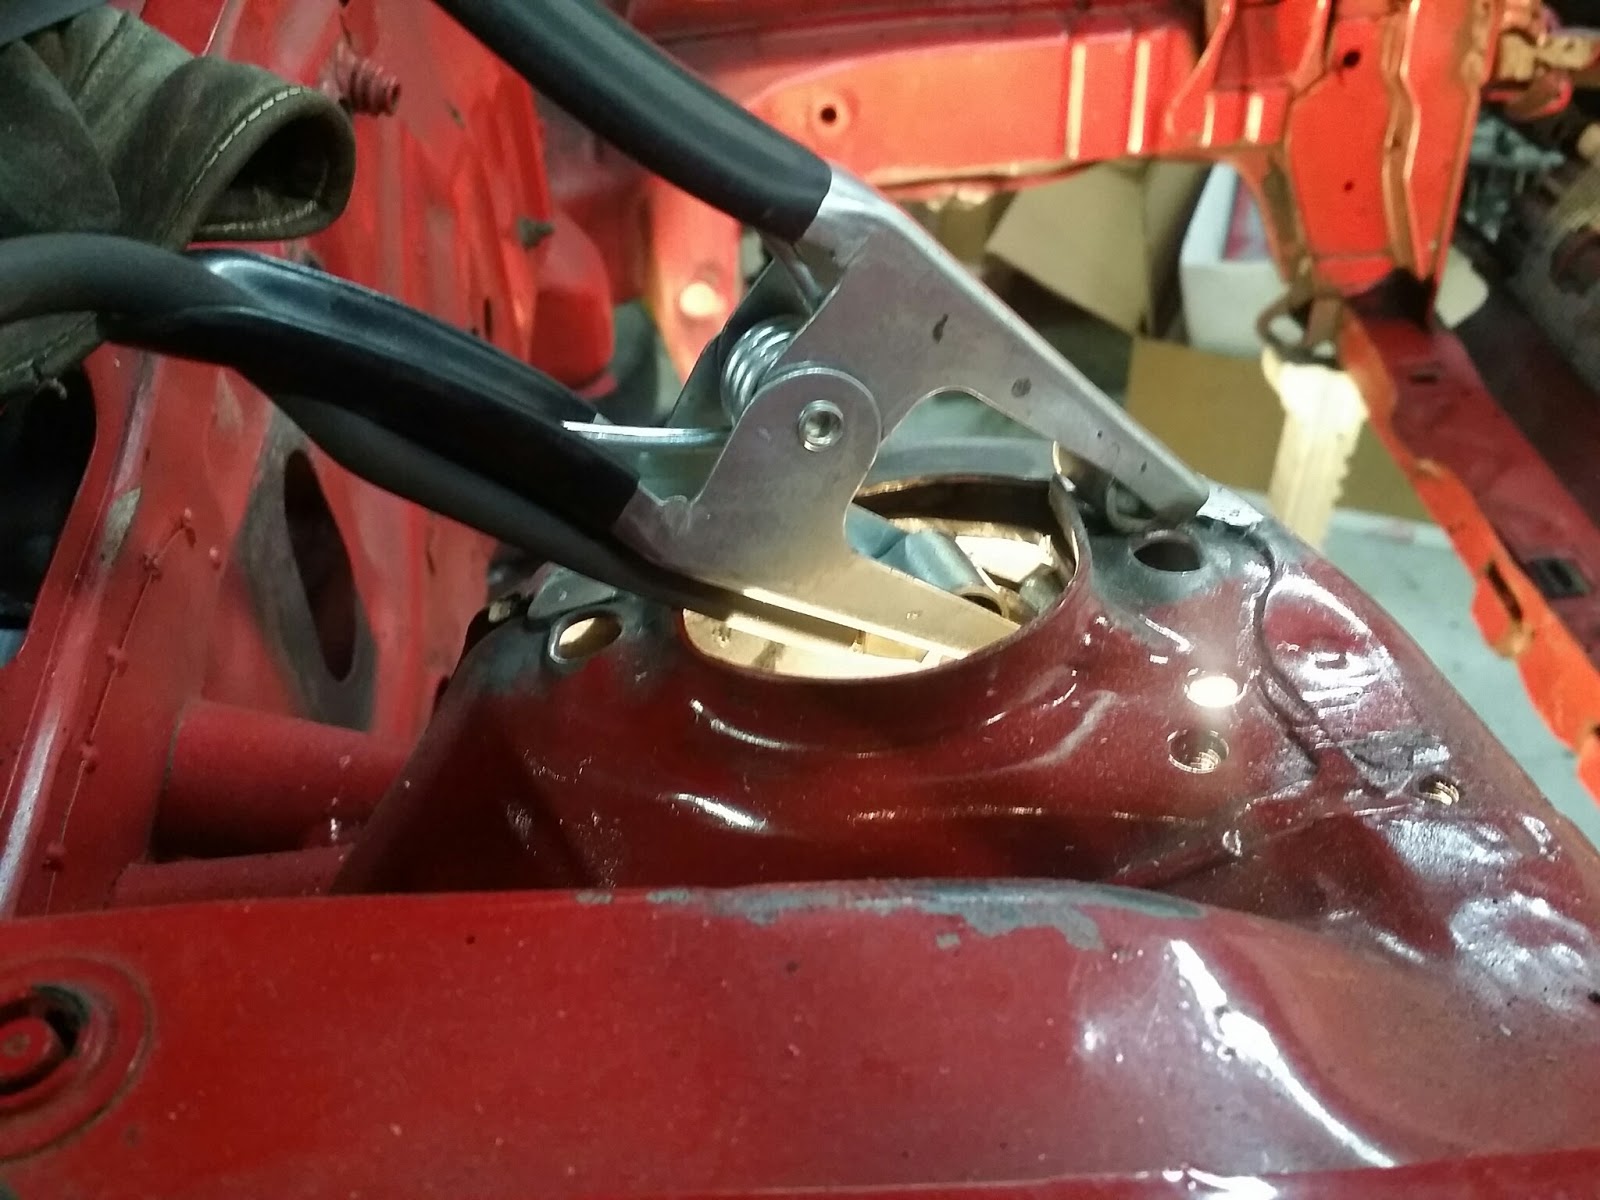
Another necessary task for the front end:

The previous owner hacked the tops of the strut towers up to fit really crappy and SUPER heavy camber/castor plates. I wanted to make the tops a bit more substantial because of how we decided to mount the much better Chedda's Auto C/C plates. I just trimmed the cardboard to fit the underside of the tower and traced out the existing hole, transferring that pattern to steel:

After some cutting later, we get a piece that nearly fits:

Honestly, this HF band saw is ABSOLUTELY one of the best things you can buy at HF, as long as you get good blades for it:


 Of course, that will get cleaned up with a grinder before being welded in to the underside of the shock tower top.
More back window goodness:


And back to the shock tower underside:
 Without adding TOO much weight, those pieces will give enough substance for a third hole to completely stabilize the Chedda's C/C plates. I don't actually like having nearly anything bolted in a single line, especially not when the mounting point has been hacked apart allowing things to rock. That will eventually lead to something fatiguing and failing. Not good on a race car!
Some underside cleanup:

 Then they get tack welded in! You don't need to go crazy welding everything fully. You just need to keep the plate in place since the shape is pretty much locked in and not going anywhere, and another bolt will be added in to compress it all together.
Clamping was a bit fiddly:


There you have it:

Nicely secured!
Now a short aside about one of the things that has fallen by the wayside over the decades:
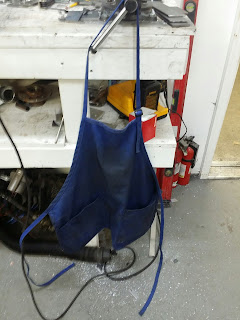 Aprons. Aprons are exceedingly useful, and yet, you usually only see them in regular use by food prep people. They have pockets. They keep what you need handy. They help keep crap off your clothes. They are another layer of protection when cutting and grinding. The above apron is a super cheap one and it isn't what I prefer, but, it is a most excellent help to the work I do. I keep two scales, my Sharpie and my center punch in the pockets, sometimes a small tape measure and other times bolts and nuts. If you want to up your fab game, wear a frickin' apron. So sayeth The Beave.
More cardboard was trimmed and more aluminum was marked:

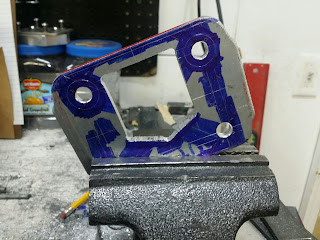
This is the backing plate for the master cylinder bracket mount:


The hole pattern was pretty easy to figure out from the pedal box:
 ALWAYS DOUBLE CHECK especially with a part you have a bunch of time working on. A very simple visual check will show if your hole centers are way off! This is really important.

Here we are marking the plate for the hole:

To make this simpler, I decided to just notch out the center and not get all fancy-complicated:


This bellcrank is what I need the notch to clear:

Aluminum is a material that really, really dislikes sharp corners. I marked and drilled out the corners:
 This will ensure that cracks do not develop in the backing plate.
I drilled larger holes to fit a hacksaw blade through to take out the center notch:


I could have just hacked and welded the thinner piece on the left of this pic:
 But I wanted to not warp the backing plate with the heat from welding and made the effort to cut out the center..
Some file cleanup later:

Test fitting:
 Oh yeah! I think that looks really good!
Here is the bellcrank barely clearing:

That is not quite enough clearance and that will be address soon.
The other issue:

 That is not a lot of meat on the joint between the angle and backing plate for a really solid and, more importantly, rigid connection between those pieces. That will be addressed before it is all welded together.
A side view of the assembly:

I decided to notch out the top of the hole for the bellcrank:


This is better and it now clears as it should:

Then I sliced the top support to match the top of the rear plate:

Then I notched a little more to have a very clean joint that still clears the firewall sheetmetal:

Some flap wheel work later to V the edge of the cap plate for better penetration:

I think it was time to replace this lens cover:

Tacky tacky:

Bam!

Shazam!

Kapow!

I'm really pleased with this fitup:

Back to mounting the lexan windshield!
Here are the mounting tabs and mandatory straps:

It's just 1/8" aluminum with holes drilled in the ends:

The lower edge of the windshield needs more support, so, I bent some tabs to support the lower edge of the windshield at the appropriate depth and angle:

Instead of fumbling around with lots of little parts trying to stack them, the thicker squares are simply glued onto the strapping:

I really like that glue! It is a gel, so it doesn't run as much and has a light blue tint so you can see where the heck it gets applied. There will be more on how the windshield is actually mounted a bit later.
Next up we have the bracket for the dual Tilton master cylinders:


This should help explain what I was thinking:

Simple angle wings reach the other holes in the front:

Test fitting is always important, especially when you find corrosion that needs to be cleaned up:

Here's the top part being mocked up:


I like it!
Here's the top part welded up:

On to the tying in the bottom mount points with some heavier angle:

It is easy enough to find something to scribe a radius on to the corner and then nip the corner off to the line:

Here's a view of the bottom

Consistent layout is important and takes some practice, but you can achieve excellent results being mindful of how you do things:

Next up is figuring out just how to run the throttle cable here:

With this cage bar in the way:

Now with some TV magic, BAM!

I got it to fit rather handily with some time applying a flap wheel to the cable flange:

While I was working on the front of the car, Ed was busy working on the rear window:

I really like how clean these Quicklatch fasteners install:

Back to the master cylinder bracket! The clevis adapter that Tilton sent didn't quite fit:

Another necessary task for the front end:

The previous owner hacked the tops of the strut towers up to fit really crappy and SUPER heavy camber/castor plates. I wanted to make the tops a bit more substantial because of how we decided to mount the much better Chedda's Auto C/C plates. I just trimmed the cardboard to fit the underside of the tower and traced out the existing hole, transferring that pattern to steel:

After some cutting later, we get a piece that nearly fits:

Honestly, this HF band saw is ABSOLUTELY one of the best things you can buy at HF, as long as you get good blades for it:


More back window goodness:


And back to the shock tower underside:

Some underside cleanup:


Clamping was a bit fiddly:


There you have it:

Nicely secured!
Now a short aside about one of the things that has fallen by the wayside over the decades:

More cardboard was trimmed and more aluminum was marked:

This is the backing plate for the master cylinder bracket mount:


The hole pattern was pretty easy to figure out from the pedal box:


Here we are marking the plate for the hole:

To make this simpler, I decided to just notch out the center and not get all fancy-complicated:


This bellcrank is what I need the notch to clear:

Aluminum is a material that really, really dislikes sharp corners. I marked and drilled out the corners:

I drilled larger holes to fit a hacksaw blade through to take out the center notch:


I could have just hacked and welded the thinner piece on the left of this pic:

Some file cleanup later:

Test fitting:

Here is the bellcrank barely clearing:

That is not quite enough clearance and that will be address soon.
The other issue:


A side view of the assembly:


This is better and it now clears as it should:

Then I sliced the top support to match the top of the rear plate:

Then I notched a little more to have a very clean joint that still clears the firewall sheetmetal:

Some flap wheel work later to V the edge of the cap plate for better penetration:


Tacky tacky:
Bam!
Shazam!

Kapow!

I'm really pleased with this fitup:

And that is where I will leave off for today, as there is more stuff to do! Since I have more people than ever pestering me to update my blog, I will try to get in at least once post a week for the foreseeable future.
Please leave me feedback either here or on my Facebook page, which you can find by clicking this link: Beaver Built on FaceBook
You can subscribe to receive new post notifications by entering your email in the box on the right of the article, by RSS feed or by FaceBook.
Thanks for reading and I hope you find this stuff useful or amusing or both. =)
No comments:
Post a Comment