I am sure that most of you are familiar with the "five minute job" syndrome: You go to start a job that should only take "five minutes," and before you know it, the day is gone. Well, today wasn't EXACTLY like that, but the LAST task of that day took a lot longer than I was suspecting it would.
I take care of the yard at my grandmother's house where the rest of my family live. My two sisters are allergic to most green stuff, so mowing the lawn is not something that is really possibly without heavy drugs. Drugs+powertools=bad nicknames like Mr. Two-Toes. That's bad. Definitely bad. So, I take care of the lawn and some of the other things like hedges and whatnot. It's something I'm fairly familiar with since I was formerly employed in landscaping (mostly lawn maintenance). It was so beautiful out today, the breeze and low humidity made it a real joy to be outside working. I had an easy day of moving the lawn, trimming up the hedges, and finally edging. Most of the tools I am using are electric. And they suck. I hate dragging a cord around and having very little power compared to the professional tools I was trained and become proficient with. Still, one must do with what one has. That brings me to the final task of the day: Re-spooling the line in the weed hacker/edge destroyer/window breaker. (Ever launched a rock through someone's windshield? heh heh heh)
Here's the tool in question:

It's a Craftsman electric doohicky. My biggest gripes with it are that it hasn't died yet and that the head is very loose and makes for some interesting edge lines around the lawn . . .
Now you might be thinking "WTF does this have to do with fabrication?" Well, hold your horses, mister. (I doubt there are any misses reading this, and if there are, please let me know! I think that would be totally faboo!)
Take a gander at this:
That, dear reader, is the line spool. The nice hole in the middle is supposed to be covered in plastic. That is the part that you bump on your surface to extend the line. After years of use, it wore through. Not being one to ignore the problem, I decided to fix it.
Some rummaging around turned up some 1.25" wide, .100" or so thick aluminum leftover from another project. A hack saw and file later, and I came up with this:
Simple, right? Not so fast! Mr. Murphy was soon visiting! I haven't had a visit from him in a while, and he chose to stop by this afternoon.
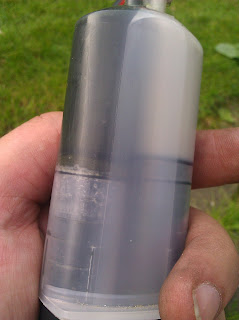
Here's a typical tube of two part epoxy:
If you will pay close attention to the side with the darker crud, you'll notice a loverly white coating on the inside of the tube. That was oxidized crap that was preventing me from dispensing that half of the darn mix. After some fussing about (that took longer than most of the rest of this project put together), I managed to free up the tube plunger and dispensed a modicum of the epoxy mix and mixed it on my handy Hot Pocket Palette of Awesome, securely affixing the two pieces together, as such:
A few tips when using glue or epoxy: CLEAN, ROUGH, MIX, HOLD!
CLEAN your surfaces. As you can see, the spool is not the cleanest part in the world, given it's close proximity to green plant matter, dog poo and dirt of all sorts. I cleaned the rings where the cover plate was to be affixed as best I could then moved on to the next part.
ROUGH your surfaces that are to be bonded, ESPECIALLY METALS. There are a few exceptions to this rule, however, those usually involve plastics and glues that actually dissolve part of plastics being bonded together. In some other cases, you want to have the parts be polished (such as bonding acrylics). In just about any other case, you want to have the surface be textured to ensure that the epoxy can have a mechanical grip on the part, not just a light chemical bond. You don't need huge gouges in the materials, unless the parts themselves are subjected to gross shear forces in ways that epoxies are not typically correct in, or in a hostile environment (such as when using aluminum putty epoxy to reshape oil passages in a Honda oil pump). A light roughing of the surfaces with some sandpaper in the 150 grit range (or rougher Scotchbrite pads) is usually about the right finish for a good bond.
In my case, I used 180 grit sand paper (since that was the first thing I found on my dad's work bench). I took the shiny surface off the aluminum and used a flat block that I found to get a good surface on the plastic of the spool.
I won't really get into choosing epoxies right now, BUT, there are zillions of choices and there are nearly always good choices to be made. Truthfully, I don't think that this epoxy was "correct" but, after I let it set up, I wound on some new line and took it for a test spin:
No issues using it, at least in my short test. It didn't even scratch the patio block I used for the test. Of course, long term testing will be conducted to see if my inexact epoxy choice (whatever I found in a 2-part system vs. dollar store "super glue") holds up to further use and abuse, or I end up with an aluminium disc slicing through my leg. This should make the next time I do the lawn veeeery interesting. LOL!


No comments:
Post a Comment