For the readers of the blog, an explanation: We're now getting towards the part of the build that is a bit frenzied, so, there were times I didn't capture a lot of things. There's still a bunch of pics, but, well, stuff had to get done and I didn't take the time to take pics of everything. Anyway, back to the stuff you actually want to see and read about:
Here's the radiator sitting mostly in place:
I trimmed the bottom of the rad support to recess the radiator lower:

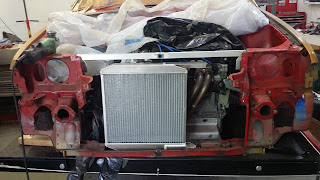
There isn't a whole lot of room in front of the engine in this chassis:
 "EF" guys should STFU about trying to fit turbos and headers in 2G/4Gs . . .
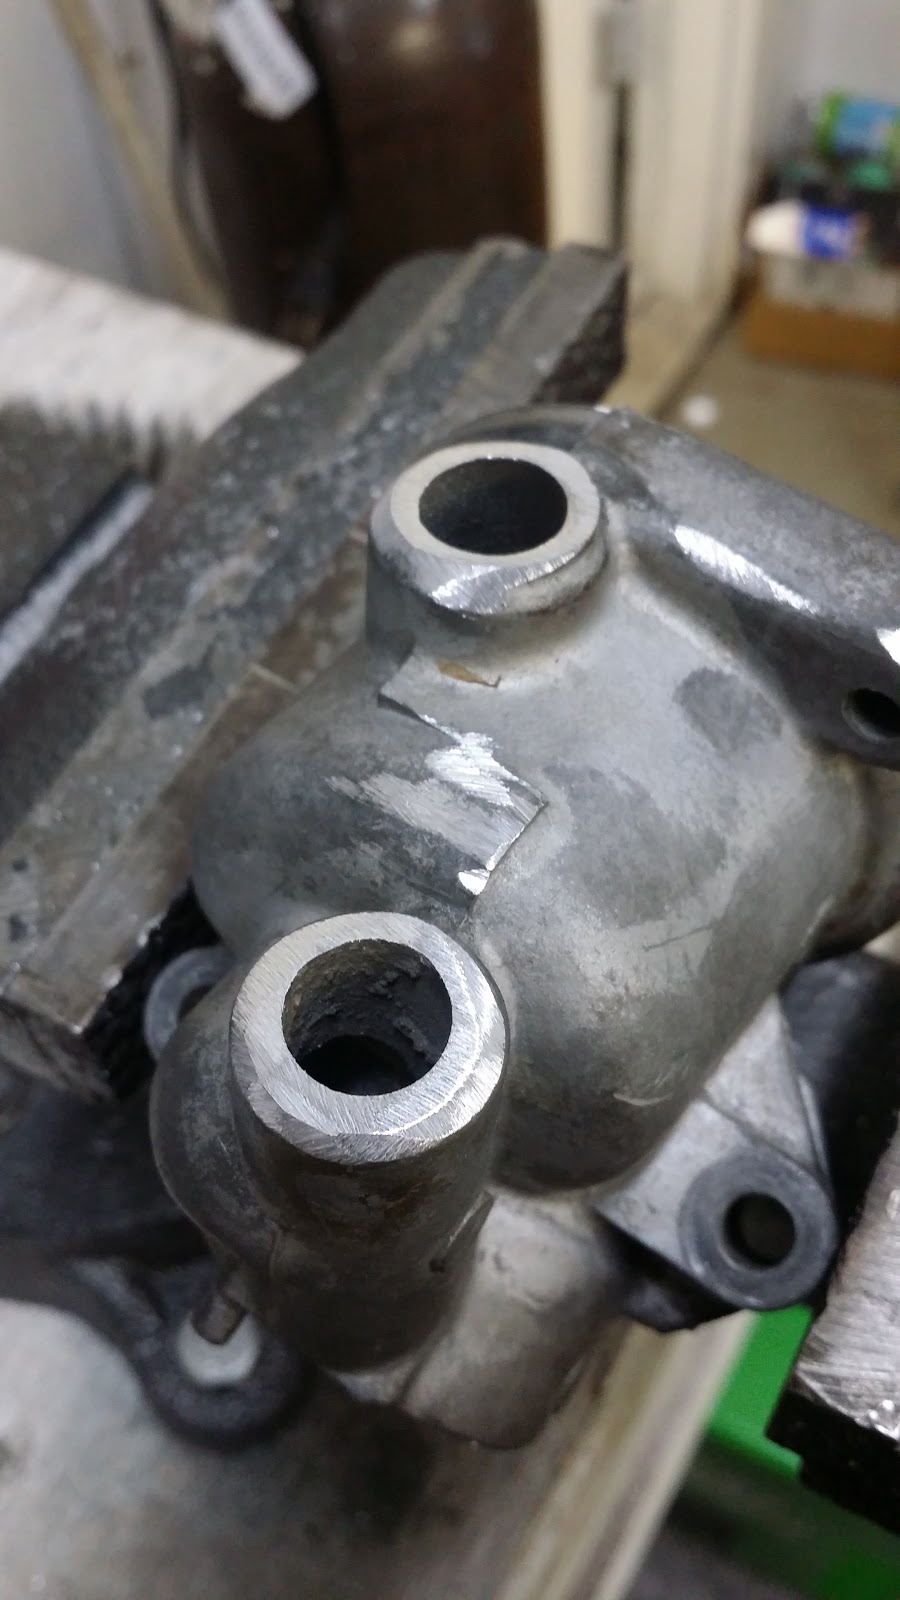
I think this is a pretty clever bit:

Since the custom radiator was made to fit in the stock mounts, I just took the cups for the stock rubber mounts and welded them with a spacer to get the proper height:

MIG makes stuff like this so much easier!

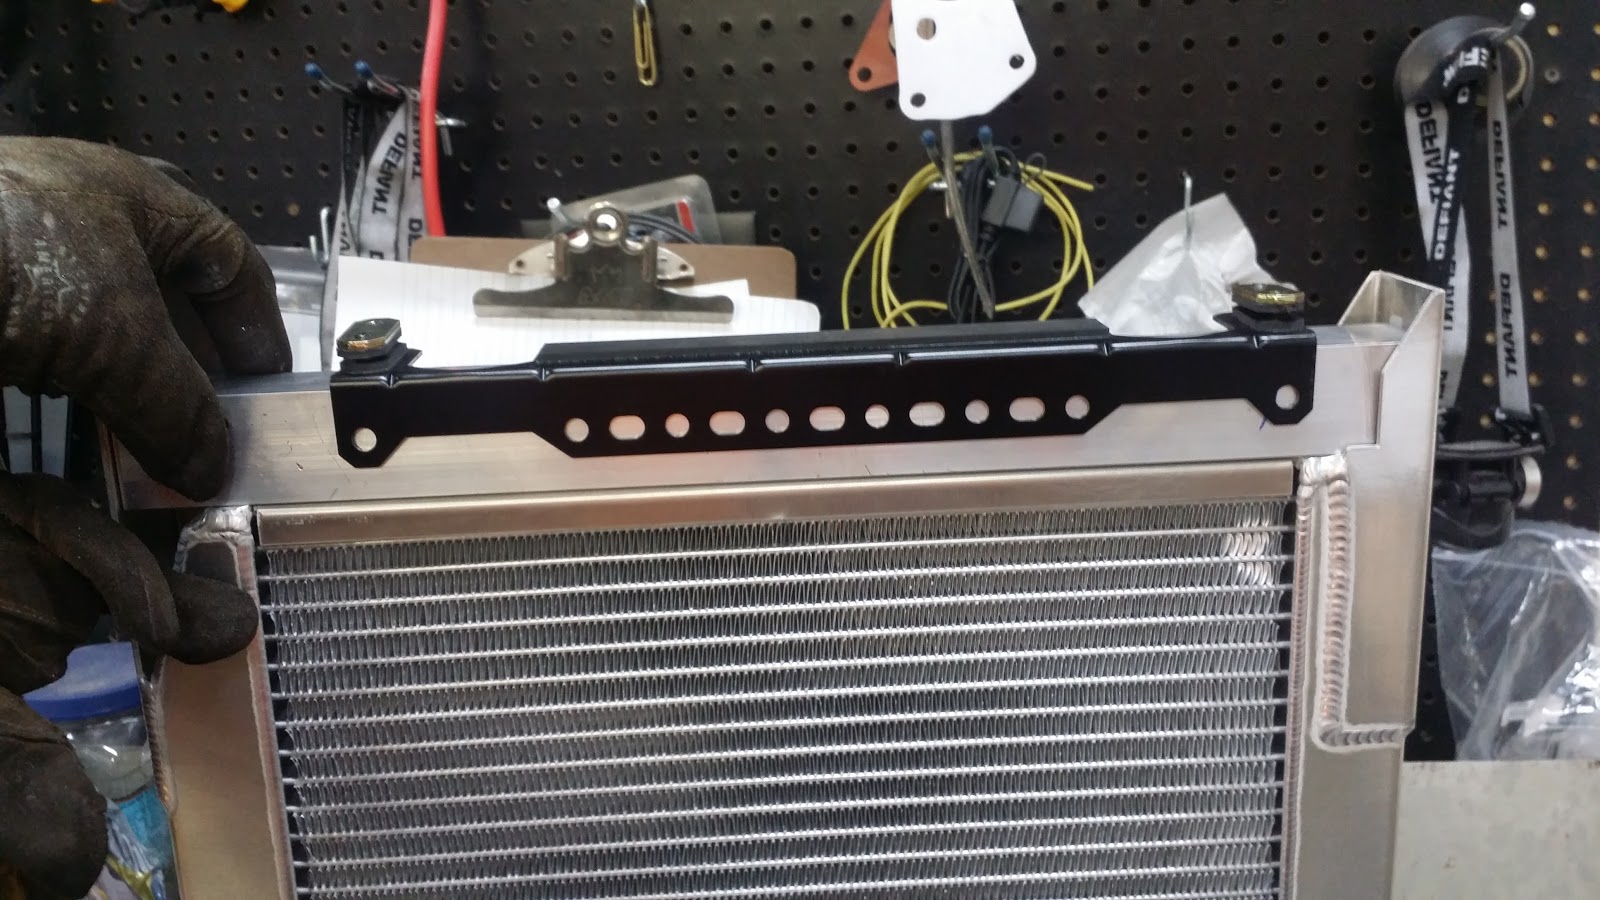
I skipped a bit here, but, I decided that the best way to mount the oil cooler was to add some aluminum angle to the side of the radiator and bolt it to that:

Measuring, marking, drilling"


Cleaning, clamping, and welding prep:

And there we have it!

It even fits so far!

I almost forgot to snap pics of the top mounts, which is just a slight variation of the stock type:


Here it is in all its naked glory:

Another view of the stuff I added to the side:

Another view of the engine side of the top mounts:

Oil cooler bolted on:

Side view of how everything is fitting:

Maximal header clearance:

I love those copper nuts for exhausts!

Did you think I was going to hang an oil cooler unsupported from the side of an aluminum radiator?


I even glued on some rubber to help dampen vibrations:

The thing is that I oopsed the side I glued the rubber on, so I had to make another bracket:

Here's how I fit the bracket to the cooler:

The main parts of the cooling system are complete:

I REALLY like how this turned out!
Here's the radiator sitting mostly in place:

I trimmed the bottom of the rad support to recess the radiator lower:

There isn't a whole lot of room in front of the engine in this chassis:

I think this is a pretty clever bit:

Since the custom radiator was made to fit in the stock mounts, I just took the cups for the stock rubber mounts and welded them with a spacer to get the proper height:

MIG makes stuff like this so much easier!

I skipped a bit here, but, I decided that the best way to mount the oil cooler was to add some aluminum angle to the side of the radiator and bolt it to that:
Measuring, marking, drilling"


Cleaning, clamping, and welding prep:

And there we have it!

It even fits so far!

I almost forgot to snap pics of the top mounts, which is just a slight variation of the stock type:


Here it is in all its naked glory:

Another view of the stuff I added to the side:

Another view of the engine side of the top mounts:

Oil cooler bolted on:

Side view of how everything is fitting:

Maximal header clearance:

I love those copper nuts for exhausts!

Did you think I was going to hang an oil cooler unsupported from the side of an aluminum radiator?


I even glued on some rubber to help dampen vibrations:

The thing is that I oopsed the side I glued the rubber on, so I had to make another bracket:

Here's how I fit the bracket to the cooler:

The main parts of the cooling system are complete:

I REALLY like how this turned out!
Please leave me feedback either here or on my Facebook page, which you can find by clicking this link: Beaver Built on FaceBook
You can subscribe to receive new post notifications by entering your email in the box on the right of the article, by RSS feed or by FaceBook.
Thanks for reading and I hope you find this stuff useful or amusing or both. =)