This past weekend, being Thanksgiving weekend here in the US, didn't turn out anything like I had planned. It was quiet and restful, for sure, and that was a very good thing, but it wasn't as productive as I thought it would be. That's mostly OK, though. I needed the break. I won't get another break like this any time in the foreseeable future, so, I took advantage of it. =)
My CRX is rocking stock suspension, aside from new shocks and springs, from 1988. (89 model year, sold in 88.) Yeah, I think it is time to do something about that. The biggest issue right now is the bushings. The car tends to wander a bit under power. Cruising, it holds fairly straight, but get on the gas and you better be paying attention. Most of the ball joint boots are on the verge of falling to pieces, too, so, pretty much everything needs to be replaced: bushings ball joints and eventually steering bits, too.
The first things lined up to do are new wheel bearings. I had purchased a set of EX knuckles and brakes a while back, as they are a direct bolt on swap that allows for proper suspension geometry and also going from 240mm (9.5") discs to 262mm (10.3") discs on a completely OEM package. On a light car, I think that the typical 11" brake packages are overkill, and my CRX is certainly light. I do, however, want a bit more thermal mass in the brakes, so the 262mm rotors are the perfect compromise. The larger rotors increase the braking torque applied (as the moment arm is longer) with less pedal effort, which is a good thing since I greatly downsized the brake booster to fit a future intake manifold. (Not that the brakes are terrible right now. They work.) Overall, I am expecting the brake part of this to work fantastically.
Anyway, enough rambling, on to pics of work!
This is the "Heavy duty slide hammer" package from Harbor Freight:

I'll probably write up a separate review of the thing. It works, but man, parts of it are terrible. It worked to pull one hub out of the bearing, but not the other. I don't have pics of it in use as I needed both hands and feet to work the slide hammer since the knuckles I am working on are off the car. If they were on the car, I honestly would have had much less of a difficult time getting the hubs out.


The shiny rings on the stem/stub of the hubs are one of the inner bearing races (races are where the balls of the ball bearings roll, kinda like the track at a race track, but with much less crashing, hopefully) and those need to get removed as well. If you plan on doing this job yourself, you will nearly always have this issue, so it is better to be prepared to deal with it right away.
Before I get to taking the race off the hub, here's a look at what I am doing with the studs:

In order to be track/strip complaint, you are supposed to have extended wheel studs and open ended lug nuts to allow track officials to see that you actually have your wheels fastened on correctly so you don't kill yourself or other people when racing. I REALLY didn't want to have to deal with the Roman War Chariot look that you get when using the ARP wheel studs, but I did need something longer, so with some help from my parts store pimp, Mike, I purchased enough of the longer wheel studs you see above for the whole car.
Wheel stud part number:

The knurling isn't exactly the same, but it will fit in correctly and securely and I won't have to worry about anything at the track. YAY! (I also bought some Gorilla brand open ended lug nuts, too, so I am ready!)
The studs are very good quality, and on the base of the stud, you can see that they are very strong, being "10.9" standard hardware:

Way better than those cheap, crappy "tuner" studs that people buy with the scary aluminum lug nuts made in who knows where out of stuff that really isn't quite metal. heh
So, back to getting the race off the hubs! My dad was a big help as while I was taking all this crap apart, he volunteered to stop by Harbor Freight on the way back from food shopping and pick this up for me:
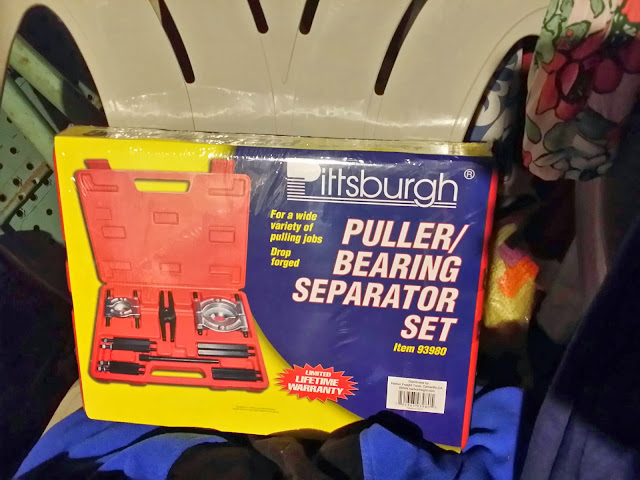
This package definitely deserves a (mostly positive!) review. I was very surprised to see an ACME thread on the "pressure shaft" (I forget what it is supposed to be called). Acme threads are square shouldered instead of angled. This lets the threads take a LOT more force without galling. In this kind of tool, where a heck of a lot of pressure is built up, you need that. YAY!
The first race took a bit to get off as I was still getting familiar with setting up the tool, and I had to change configurations a few times until I figure out exactly what worked, but work it did!
I first tried the smaller seperator, but the radius of the inner part really didn't match well to the radius of the outside of the race:

Closeup:

That wasn't going to work well at all. I swapped over to the larger seperator and was a bit annoyed at the studs, as they were barely long enough to fit. I managed to get the nuts threaded on securely enough, though:

The next step was to set up the puller bits.

At first I used the thick piece of steel across the top, thinking the race would pop loose after it started moving, but I was mistaken. You can also see the ACME threads in the above picture, too.
I managed to get the race pulled up as far as the bar would allow:

But I had to come up with a different plan. I had the socket that I used to pound the second hub out, but sockets have holes in the back for the drive of the ratchet, so I needed something to cover the holes enough to prevent the shaft from going through, but still fit through the race when it pulled free. I managed to find some washers, though they were really thin. I tripled them up and hoped for the best:

It worked!

The first race pulled off really easily since I had already started it moving with the bar across the top, so the washers didn't bent very much:

Pulling the second one off with just the washers on the socket bent them a good bit, but it really wasn't as bad as I thought and it worked well enough so that I got the second one off in less than 10 minutes. Cool!
Too be continued . . .
No comments:
Post a Comment