Tag Line

"Built Dam Strong!"

12 September 2012

Project Lazarus Update: Stuff actually starts to get done!

FINALLY! Some progress other than moving from one place to another. heh

I started out by taking out the radiator and fan:


Yes, that is a real Flex-a-lite fan. As you can see the fan guard "self-clearanced" with the hot downpipe (which I never got around to wrapping) and needed a new mounting bracket made for the bottom of the fan due to heat damage and how the radiator was emplaced. (Again, I didn't do that. heh)

Radiator out!


Hacked to death radiator support:

That is going to get fixed to at least look decent before everything goes back together!

Front shot:

My very first downpipe:


That is a legit 3" downpipe on a T25. It's rusty now, but it has survived a heck of a lot. There are some improvements I think I can make to it eventually, but for now, it will stay just as you see it.

Another closeup of the lines that I ran hastily:

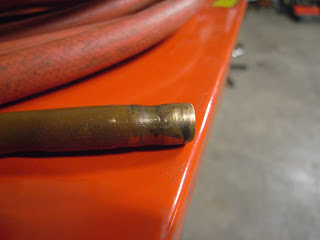
I honestly hate braided stainless steel lines. They are extremely abrasive and if left to vibrate around can easily eat their way through anything, including belts, wires and even engine blocks! (That is not conjecture. I've seen SS braid eat through an iron block V8.) The copper line is a compromise in using was is available at the time. It works perfectly well, as it isn't under much tension or stress, but over time, it WILL break or crack due to work hardening from vibration and heat cycling. It will be replaced and the lines overall will be run in a cleaner and more efficient manner.

On to the next task: fitting the intercooler! "EFs" are notoriously difficult fit FMICs (front mount intercoolers) because of this:

That is the front bumper support. It fits across the whole front to provide structure in the event of a crash, and due to how low the front of all 88-91 Civics are, the bumper support inconveniently lies right where most people want to put an intercooler.

The other part of the issue is that the bottom of the bumper support has this lip that was made for the convenience of pinch-welding the pieces together at the factory. Here's a closeup of the lip:


A few minute with an angle grinder and a cut off disc and flap wheel and this is what you get:


Once I get my sheet metal brake (bender) set up, I will be bending up some sheet to cover the gap and provide more structure for mounting the intercooler to the underside of the bumper support, something like this:


I have some pretty clever ideas on how to actually mount the intecooler, which, of course you will see after I develop the ideas further and put them into action. 

Compressor Crackdown

 Anthony (the owner of the garage I am moving my operations into), told me that his air compressor, that he inherited with the garage, didn't seem to be performing well at all. His impact gun couldn't even take off some wheel bolts from his Mercedes.

Here is the offending compressor:

Nothing crazy, but it certainly should be capable of running an impact gun.

The first thing I noticed was that the joints from the tank to the regulator body were LOOSE! Duh . . . I got some new teflon tape on the joints and tightened up:


Next thing is the quick coupler fitting:

The coupler is one of the most important parts of the whole air system, as it has to hold pressure and deal with hundreds or thousands of reconnects. The fitting was attached to a swivel, which is normally good, but, the swivel was of sub-par construction and really made the connection leaky and the material was actually causing wear on the threads of the connector. What a crock! So, as seen above, I connected it directly to the regulator housing.

Speaking of the regulator . . . there isn't one. It broke off a long time ago. We're going to have to get a replacement so we can dial back the pressure when needed. Many tools shouldn't be run at 125PSI. heh

The next issue was the compressor to tank connection:


The issue came from the copper connection pipe being completely mangled:

The dip in the tube came from someone tightening the connectors too much. When you have a compression fitting, you CANNOT crank the fittings together too much, or you will ruin the tube as the ferrule (the little collar thing that you slide over the tube to seal the fitting) destructively deforms the tube at the contact point.

How the heck do you fix this? You'll need a VERY good tube flaring kit like this:


What makes this such a good kit? Most kits you see will only have three pieces. A good kit will have replaceable tips such as these:


These tips allowed me to re-size the tubing from the inside, which allowed me to use new ferrules and seal those connections up enough so that the compressor holds most of it's pressure overnight, and correctly hit the cutoff pressure.

These issues are why I HATE compression fittings. I much prefer flared fittings, as they seal better, can be connected many more times and are easier to fit together. If you'll take my advice, NEVER use compression fittings.

Another thing fixed! OR at least fixed well enough to make the compressor useful. =) 

Perspective, or how taking the time to look at something changes everything.

Yesterday I took apart a B-series head. Looks all honky dory, right? 


Here's #3:


All the bits and pieces:


People who don't pull engines apart regularly would likely not believe how much junk gets chucked around when something goes wrong. Case in point: Aluminum shavings on another cylinders intake valves:

So, why am I messing with this? The owner of the head is letting me have it for mock-up purposes. Mocking up what? That remains to be seen . . . heh heh heh