Tag Line

"Built Dam Strong!"
Showing posts with label battery tray. Show all posts

14 August 2012

Mike's Bike is (99.5%) DONE!

I completed nearly everything! I have to make one last trip to Home Depot to pick up one more hex head bolt in 6mmx1.00 thread, since I over estimated the length of one of the needed bolts and need to straighten that out. After that, the only thing left is to source to stainless locking nuts, the kind without the plastic locking insert, since I don't want any heat melting the inserts and allowing the battery tray to drop . . . That would be a bad thing. For sure. Let me show you what I am talking about!

Mockup . . . one of my favorite things. Measuring 2xelventy trillion times, cutting/welding/drilling once. It saves time in the long run!

Here's the battery tray (again):

Here is one of the flanges Dave helped make while I was working on something else:

I had to figure out a way to make those flanges stay on and support the battery tray in a secure manner. Normally, I would try to figure out a way to do so horizontally, but given the low profile and also the requirement to make things easily accessible, I chose to use existing threaded inserts in a clever way.

This is the existing threaded insert:

I simply drilled through the hole with a smaller bit (after centerpunching it to prevent the bit from wandering too much) and ran a tap through the hole and test it with a piece of threaded rod I had:
 Poifect! Nyuk, nyuk, nyuk!

Here is the basic idea:


With that settled, I had to move on to figuring out how to secure the seat pan. Due to my design of the seat pan, I really only needed to ensure that the seat pan would not pop off the frame rails. The locator pieces lock the seat pan longitudinally, so I just had to make it so that the seat could come off fairly easily but not be accidently popped off.

Here is a view from the underside to refresh our memories of what everything looked like.

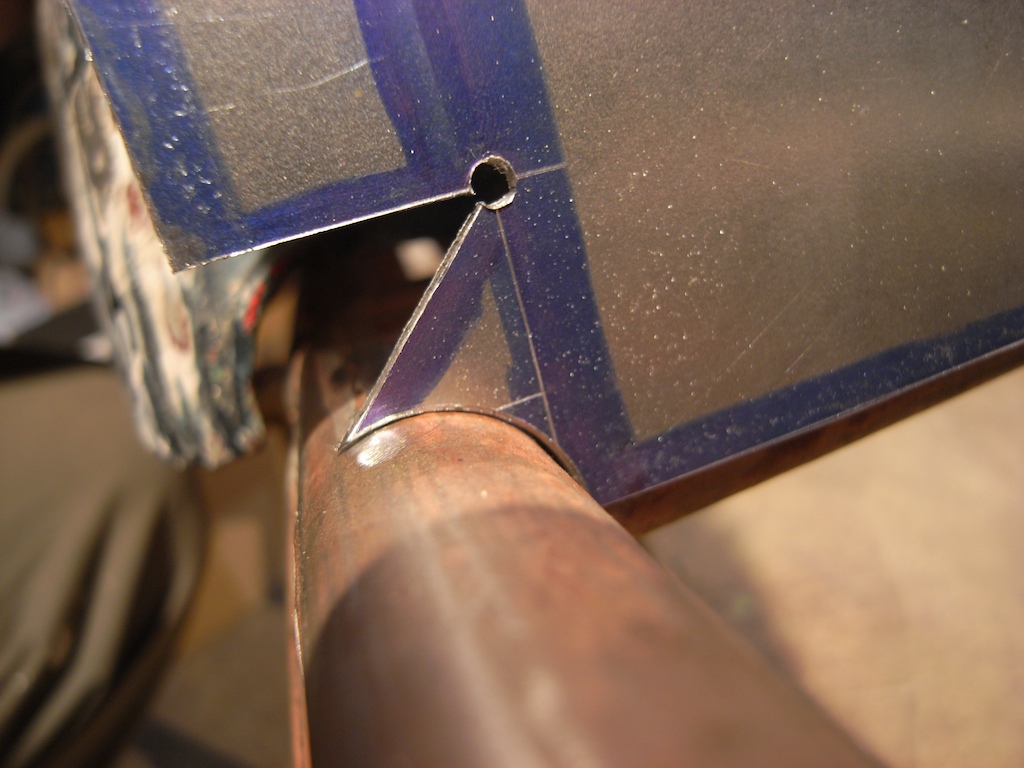
Hmmmm . . . That elliptical hole of the frame bracing looks pretty suspiciously well placed . . .

What if I made a plate to cover that, with a hole in the center that would be large enough to fit a stud through it, which would be welded on to the seat pan and then secured with a wing nut? Oh look! A suspiciously perfect stud ready to get welded to the seat pan!

I also took the liberty of cleaning up the edges of the curved section of the seat pan so that it was even all the way around.

Shazam! I distracted you long enough to have made a nice looking place from some stainless I had leftover from the handle of the charcoal started I had assembled for my father for Father's Day:

Now doesn't that look swanky?

Closeups are always good:

Back to the battery tray . . .

Here is one of the hex headed bolts.

Why did I bother with bolts? Well . . . I wanted somethign replaceable. I have seen way too many bolts get stripped out and if I welded something in place, it would make things a lot harder to replace in the future. With a bolt, you can simply unscrew it and replace it with another one. I couldn't find stainless bolts in the right size at Home Despot, so this will certainly do for now.

Here is a shot of how the bolt goes through the threaded insert and the hole that I drilled and tapped for the bolt:

I marked and drilled (intentionally) oversized holes (to allow for ease of installation):

Then noted that the "legs" of the brackets stuck up much too far:
I used a chisel point King Size Sharpie (thought I'd be done mentioning them, didn't you? HAH!) to get an approximation of how much I had to trim off. I fired up the band saw and got to sawing the excess off, cleaning them up on the belt/disc sander and ended up with this:


And then welded them on to the tray:

Not too shabby looking. Not perfect, but pretty decent. A locking nut will complete the kit when I can find some of those things, or Mike can find them, too. I'm not picky. heh

Magic tip time! I wanted to try something with making a spacer to prevent the seat pan from getting pulled too far down with the wing nut. I cut a small piece of 1/2" aluminum rod and evened up the ends. I wanted to drill a hole down the middle of the short section, but attempting to hold that in my fingers would be finger-a-cide, so I came up with a simple but highly effective clamp that gave me enough leverage to prevent the rod section from spinning.

It took a long time to tap this darn thing. I had forgotten my number drill set (you likely have no idea what I am talking about . . . unless you are a machinist or very familiar with drilling and tapping holes), so I didn't have exactly the right twist drill (commonly known as a drill bit, which isn't exactly correct) size on hand to make tapping through that section easy. But I managed. I so wanted a lathe. I would have been done in less than 5 minutes, including all the tool changes. LOL! Oh well . . .

This is what it ended up looking like:

But my measuring was off:

 Remember that whole measure a lot of times and cut/drill/weld once thing? Yeah . . . But, after testing things out, I determined that it wasn't necessary to have the spacer there at all, since the pan is 18g steel, it barely flexes when you crank on the wing nut . . . Next time, I think 20g will be easier and faster to work with. LOL!

Nearly final battery tray installed:

And the final profile view of the seat pan and battery tray on the frame:
It looks really sleek! I can't wait to see how the rest of the bike comes together! Mike's got some good plans. =) 

10 June 2012

Uber-ultra crazy-times, and some work.

I haven't posted the past few days because stuff has gone certifiably berserk. 

Thursday my friend who owns the house where my "shop" is had the unfortunate incident of having his one and only running vehicle (a Voyager) break down on the way back from the doctor's office after being diagnosed with a nasty case of bronchitis that was a few steps away from turning into pneumonia. I wasn't able to get it started right away on Thursday, as I was finishing the header since that HAD to get shipped off. My friend, Terry, had been looking for a second vehicle for a while, so he decided that it was time to pull the trigger and pick up something he could use for work (he's out of a job right now) and when the van gets fixed, his family would have two running vehicles. He found what he thought would be a good truck, and on Thursday afternoon (after I spent the morning getting the vans started, though running REALLY rough) we went to go check it out. It is a blue '98 Dodge Magnum with a 5.2L V8, 5 speed 4x4. It is in really good shape needing only some tires and a few other odds and ends. So, we drove back to his place making a stop to drop off my Kenwood eXcelon KDC-X994 headunit that I had nearly forgotten about because the display stopped working some time ago. I dug it out while I was at home earlier this week and decided I needed to send it off to get fixed while it was still under warranty. I found out that one of the national service centers was vaguely on the route Terry and I were taking, so I called and found out I could just drop the thing off. I figured I would drop it off on Friday and then have to pick it up in a week or three. I get in the place and the receptionist has me fill out a form and takes the deck and says hold on a sec while a technician checks it out. I actually stared at her blankly and said in a shocked manner "Oh! Well . . . Okay!" The guy came out a few minutes later and asked what was wrong with it, and I told him the display stopped working after I had disconnected the battery when I was replacing the valve cover gaskets on my car. He said that he would replace the connector between the flip down display and the motherboard and that it would take about half an hour. Again I stood there in shock. I went out and sat in my car for half an hour and went back in. The technician took me back into the shop and showed me that the display was working perfectly and tested all the source inputs with me looking over everything. I was escorted back to the front desk where I signed a receipt and was handed back my head unit nicely wrapped in anti-static bags along with the CD I had left in the darn thing. The front of the shop was piled high with all sorts of Kenwood electronics from stuff like my deck all the way back to 70's EQs! The shop is very well run and I have to say that the service I received was unexpectedly awesome.

If you ever have issues with any Kenwood product, I HIGHLY recommend sending it to this service center:

400 Morris Ave
(973) 586-3999
Denville, NJ 07834

Once Terry and I got back to his place, he worked on pulling together the funds to make the purchase, and after that was done, we headed back to the guy's place and did the exchange. I managed to miss a burned out brake light on my inspection . . . So we stuck to back roads to avoid the inevitable infestation of NJ State Troopers who are the biggest douchebags of all cops in my experience. (I've been pulled over in nearly every state along I-80 from Nebraska to NY, and from Maryland to Maine. NEVER have I ever been treated as badly, unprofessionally and been harassed as I have by NJ State Douchers.)

I grabbed this video:

 while Terry and I were driving back to his place. It was such a nice drive!

After all that driving and other stuff that went on, I was beat, so I sat down and got to work wiring the deck to the Honda/Acura adapter harness I was using for the other deck (an old Optimus deck with a whole 4W RMS that sounds better than 90% of the junk on the market today, and no, I am not kidding at all!) that I had just so I could have some tunes while driving. I got the harness finished and slapped the head unit in and it worked! I love this deck. It is clean, simple and powerful. The interface is not too complicated and it also looks good. It has quite a good DAC, which is the most important part of anything that plays any digital media, include "old fashioned" CDs, which I still listen to and buy. (Gasps!) The only problem was that I was getting some bad 'crackle' on one of the rear 6x9s. I got a phone call in the middle of working on diagnosing that and then my phone died and I actually fell asleep in my car until about 3AM, when I dragged myself off to bed.

I slept through my alarm, but got up and found a bunch of inquiries and curiosity waiting me about the header. I hope to have more interest soon enough as I finish more exhaust projects. 

Justin updated me on the "Bisi Beaver" header. He had attempted to get to a test and tune event this past Wednesday, and everything was going well until the water pump died on his Jeep that he uses as a tow vehicle. Since that happened, he put his Civic back on the road and has been driving it around, open header, for over 100 miles so far. He's found that he can now get the car moving and then just stick it in 5th gear and drive. That is pretty crazy! Civics are not known for their ability to tool around at low RPM and high gears. Last night, he drove it with 4 people in it and it still felt great! He's gotten his laptop hooked up, too, and says the tune is off everywhere, so there is still more power left! When he first installed his wideband, he said that the AFRs were off by about 1 point leaner than his previous tune! That is moving a LOT more air!

It was finally time to work, or, since I had been busy running around, cleaning, maintenance and upgrades! 

I oopsed when I bought these bulbs for the spare Halogen work lights that Terry lets me borrow:

I have to exchange those soon. heh 

I also found a 100W rough-service bulb that I hope holds up on the grinder:


The original rating is 40w, which is a huge stretch to 100w, so I will have to treat that very carefully. I wanted to find one of these "tough" bulbs because regular bulbs seem to die from the vibrations much faster than expected. This one even goes so far to be coated with a shatter-proof coating, much like the laminate in a windsheild, where they bulb might break, but it shouldn't shatter into zillions of pieces. 
Here's the box:


It gives off a good, pleasing light. Having the light on the grinder will make grinding tungsten an all together more pleasant experience. 

More sharpies. Yes. I know. WTF? But . . . I can't help it. 


My blog is sounding like a condom shop: KING size! Magnum! Superior performance! LOL! These King sized Sharpies are certainly useful. I don't think I would carry a normal sharpie after seeing these. The "Pro" formula actually makes a difference when writing/marking on not so perfectly clean metal. I like them!

 I had forgotten to highlight this:

This is my LEAST favorite type of countersink, but, at least it is decently cheap (under $6). The type of countersink I actually want is rather expensive and I couldn't afford a set of those at this time. I'll have to write an article on countersinking soon . . . 

I cleaned up a good chunk of things after playing around with my new Sharpies and then laid out the battery tray for mike's CB750!


I took my time and made sure that I got everything measure and laid out as exactly as I could. I also centerpunched a few places for holes to be drilled:


Since I don't have a metal break, the bend line is going to be more of a radius. This is very good quality (read: strong and harder to bend) 18g sheet. I totally could have used 20g, but live and learn. LOL! Given these facts, drilling a small hole n the corners allows me to adjust the bend to where I need it and allows the corners to meet more precisely when everything is bent. There isn't any detriment to doing so because I will be welding the corners after everything is where I want it to be.

Here are my layout tools, plus the square you can see in the background of the second pic bellow:


How I wish I had a sheer . . . but a reciprocating saw with a sheet metal blade does well enough:


 I just started outside the actual piece and then trimmed everything up in the band saw.

See the rough edges?


DEBUR! ALWAYS! Even if the edge is going to just be cut in a minute, take the time to run a good file over the edges. Those slivers are VERY sharp and will eat your hands alive. 

I trimmed up the outside of the piece, drilled the relief holes then drilled and "adjusted" (with a carbide) the frame rail spots and ended up with this close a fitment:


I am more than happy with that! 

Here is the piece ready for bending:


Bending without a brake is annoying. If saying "brake" confuses you, that is the technical name for a device that bends things, usually metal. 

I found this link showing the two most common ways to bend sheet: 


Not having a press (for a press brake) or a regular style brake (yet), I just angle iron, pliers and a hammer. I didn't have enough hands to take pics of everything, so you get this pic of the complete last bend:


It worked well enough, though I will make some adjustments (with a hammer) before welding the corners, as that will lock the piece together and make is VERY hard to do anything else to the piece.

Here it is in place:


Now, I'll talk a bit more about the holes I drilled. If I HADN'T drilled those relief holes, I would not have been able to fit the piece correctly. The metal was a pain to bend neatly, and as I mentioned it had much more of a bend radius than line. This put the ends of the tray too far apart to fit in between the frame supports. Having the relief holes drilled allowed me to roll the bend back to the point where you get the fitment you see above, which is a slight tension fit holding it in place. 

Here is a slightly fuzzy picture of how it looks from the side:


Sitting on its own: 


If you click on the above pic, you'll see how far I rolled back the front and back piece, as the corners don't exactly match up, but everything will be trimmed and welded to look nicely after I do some final adjustments. 

You can also see this in the final picture from yesterday:


After I got to that point, I got the place decently straightened up and headed back to my apartment. Once I got back to my place, I wanted to figure out why I wasn't getting any sound from my rear speakers. I found out that it wasn't that I was getting no sound, I had a speaker that was just popping and crackling. I have some Memphis Power Reference coaxs all around, 6.5" up front and 6x9" on the rear deck. I swapped the rear to make sure it wasn't a was a wiring issue or something wrong with the deck, and the speaker just barely put out any sound, at least from the woofer. I am wondering if I can "fix" it or if I should just buy a new one. I'm going to ask around and see what people say. I'd rather not spend money on another speaker, since I won't be able to find just one of these things, as they are the 15-PR692 not the current 15-PR692V2 that is sold. Le sigh . . . 

It's still GREAT to have a really decent and clean setup again. I can't wait to get my "new" amp in and wired up. A friend of mine decided to let me have his Soundstream Van Gogh. That should be the perfect compliment to what I have. The Memphis speakers seem to want a bit more juice than the 22W RMS output of the deck, which is still really good. I've also got a Clarion EQ that has a separate sub level control, which is good because while I am not going to have too much thump in my trunk, there are time when I will want to turn things up and down and having a separate knob for that to quickly access things is much better than clicking through a few menu options. 

That was a lot of typing . . . I hope I didn't bore anyone to death. heh

26 March 2012

From something old and unfinished, to looking ahead at promising things to come.

Two weekends ago I had the pleasure of meeting Mike, known as MB on Do The Ton. He's got an older motorcycle frame that he needs some work done, and I picked it up and brought it to my "shop."

As you can see in the photo below, all my stuff is currently crammed in a corner of a two-bay attached garage. Some people might not think much of it, but this . . . this is heaven. =) 


My stuff is crammed in a corner because space is being made for me to occupy the large space by the doors to the garage. I don't even have to do any heavy lifting of other people's stuff! Isn't that lovely? I think so. I really do. =) 

This is Mike's frame. A lovely frame, as far as I can tell, covered in some leftover paint and Aircraft Remover. 


This is Mike's tank. A lovely tank . . . Ok, I'm not going to be intentionally redundant (much). 


I love CAD. Who doesn't? Most people don't think they can afford, it, but, with the miracles of modern science, now you, too, can afford to use CAD to mock up your parts! Take a look at the fine model that Mike and I used to get a good idea of what he wants and needs for a seat pan!


You may be thinking to yourself: "WTF is he on about? CAD? That's just a cardboard template." And if you think that, you would be correct! Cardboard Aided Design is the latest thing in fashioning all sorts of components from scratch! low cost an fast modeling times that assure a near perfect fit are the wave of the future! 


I'll be tweaking the original CAD mockup for precision based on the discussed dimensions for the components that need to fit between the battery box and the seat pan, and working out some other details to make sure that everything fits and looks just as Mike has in mind!

Soon to be added to the space are a worktable and a bead roller. I'll use the work table to mount my spare vise (a heavy sucker that will hurt immensely if it drops upon your toes), which will hold a bead roller, which will be of great use in stiffening the seat and battery pans! I'll also be trimming some tabs, welding a few spots and welding on a loop on the back of the seat. I am looking forward to getting this project rolling soon.