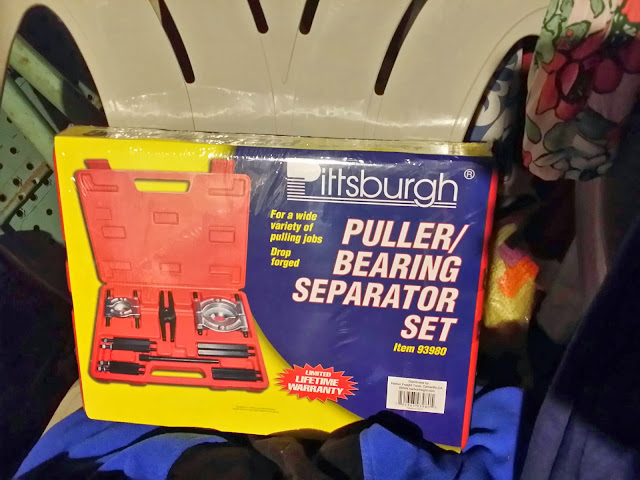
I ruined my fresh manicure! I'm kidding. No, seriously, I'm kidding.
Today was another day where I was fighting everything to get something done and I made some forward progress, but, well, you'll see. heh
The spindles are now 100% complete:

I really like these MOOG lower ball joints:
 The boots and hardware are very excellent. I expect long life out of these!
On to more interesting stuff. I figured that even if I couldn't use all 8 bronze flange bushings, I could certainly use 4 of them, even if they do get reamed off center doing it by hand. I didn't think that it would hurt one bit to have the bushing slightly off. It would get squished nicely by the bolt, anyway!
I wish the flange part was a bit wider:

 I'll deal with it for now.
I cleaned up the six rubber plugs and popped them back into place:
 A keen observer will notice there are only three of four bolts in the holes. I managed to misplace tht particular bolt for a long while . . . Grrr!
Next, started to fit up the new steering rack. Everything was going smoothly until I went to clamp the passenger side of the rack:
 I have a power steering subframe. The power steering rack is thicker in diameter and the bracket that holds it in place is longer.
Compare the above holes to the original subframe:
 NUTS!
NUTS!
Here is how much room is left in between the new Prothane poly bushing and the subframe when the two bolts are tightened on the driver's side:
 DOUBLE NUTS!
For now, the easy fix is to trim the ears off the old bushing:

And use that to take up the slack space:
 For the bracket, I am going to modify it tomorrow after work. I have a pretty simple fix in mind that shouldn't take long to implement.
The last thing I did before calling it a night was to get some of the shifter bushings pressed in!
Ew:

EEEEEW!

BAM!
 They pressed in pretty easily one at a time. I tried to do both at once, but they wanted to shift off line doing that. They eased right in one at a time. I had concerns that my press fit would be wrong, but, it didn't seem to bother anything at all.
I did need to send the reamer through one more time, however. The inside of the shift lever end was no where near round, so there was a mismatch in the bushing fit. One pass with the reamer later and the test fit is a success!
 There is an ever so slight clearance for the bolt. I don't think that will be an issue at all.
Now I need to find the other bits from the shifter so I can finish pressing the bushings in and figure out what length bolt I need for both pieces and get the sucker put back together.
I can't find my customer shifter . . . I may just throw in a good stock shifter for now in order to test the bushings under "normal" circumstances, and honestly, I don't need to bonk the exhaust as I am actually anticipating having move the shift linkage up by creating a boxed section on top of the center tunnel of the car with the custom shifter, as the bottom of the shifter is pretty darn long. So, for now that might have to do.
That's it for now. Hopefully I'll get the darn subframe bolted up tomorrow finally, allowing me to get the rest of the suspension and brakes in. That won't take long at all once the subframe is in. I do anticipate one issue, though. One of the steel inner sleeves for the radius rod bushings is rusted to the shaft of the radius rod. I really want to get that off and clean it up before installing the new bushings. I may have to cut it off, as I don't have a torch at home and can't try to heat it up easily. Propane really isn't so good for that kind of thing.
Today was another day where I was fighting everything to get something done and I made some forward progress, but, well, you'll see. heh
I really like these MOOG lower ball joints:
On to more interesting stuff. I figured that even if I couldn't use all 8 bronze flange bushings, I could certainly use 4 of them, even if they do get reamed off center doing it by hand. I didn't think that it would hurt one bit to have the bushing slightly off. It would get squished nicely by the bolt, anyway!
I wish the flange part was a bit wider:
Not bad, but not exactly what I wanted:
I cleaned up the six rubber plugs and popped them back into place:
Next, started to fit up the new steering rack. Everything was going smoothly until I went to clamp the passenger side of the rack:
Compare the above holes to the original subframe:
Here is how much room is left in between the new Prothane poly bushing and the subframe when the two bolts are tightened on the driver's side:
For now, the easy fix is to trim the ears off the old bushing:
And use that to take up the slack space:
The last thing I did before calling it a night was to get some of the shifter bushings pressed in!
Ew:
EEEEEW!
BAM!
I did need to send the reamer through one more time, however. The inside of the shift lever end was no where near round, so there was a mismatch in the bushing fit. One pass with the reamer later and the test fit is a success!
Now I need to find the other bits from the shifter so I can finish pressing the bushings in and figure out what length bolt I need for both pieces and get the sucker put back together.
I can't find my customer shifter . . . I may just throw in a good stock shifter for now in order to test the bushings under "normal" circumstances, and honestly, I don't need to bonk the exhaust as I am actually anticipating having move the shift linkage up by creating a boxed section on top of the center tunnel of the car with the custom shifter, as the bottom of the shifter is pretty darn long. So, for now that might have to do.
That's it for now. Hopefully I'll get the darn subframe bolted up tomorrow finally, allowing me to get the rest of the suspension and brakes in. That won't take long at all once the subframe is in. I do anticipate one issue, though. One of the steel inner sleeves for the radius rod bushings is rusted to the shaft of the radius rod. I really want to get that off and clean it up before installing the new bushings. I may have to cut it off, as I don't have a torch at home and can't try to heat it up easily. Propane really isn't so good for that kind of thing.