This is just a quick and dirty how-to on loading a wire feeder mounted on a swing arm, like I use at work, which I love having
 This is a really heavy duty, industrial wire feeding machine:
 The spool mounted above the actual wire feed mechanism is a 50 pound spool of this stuff:
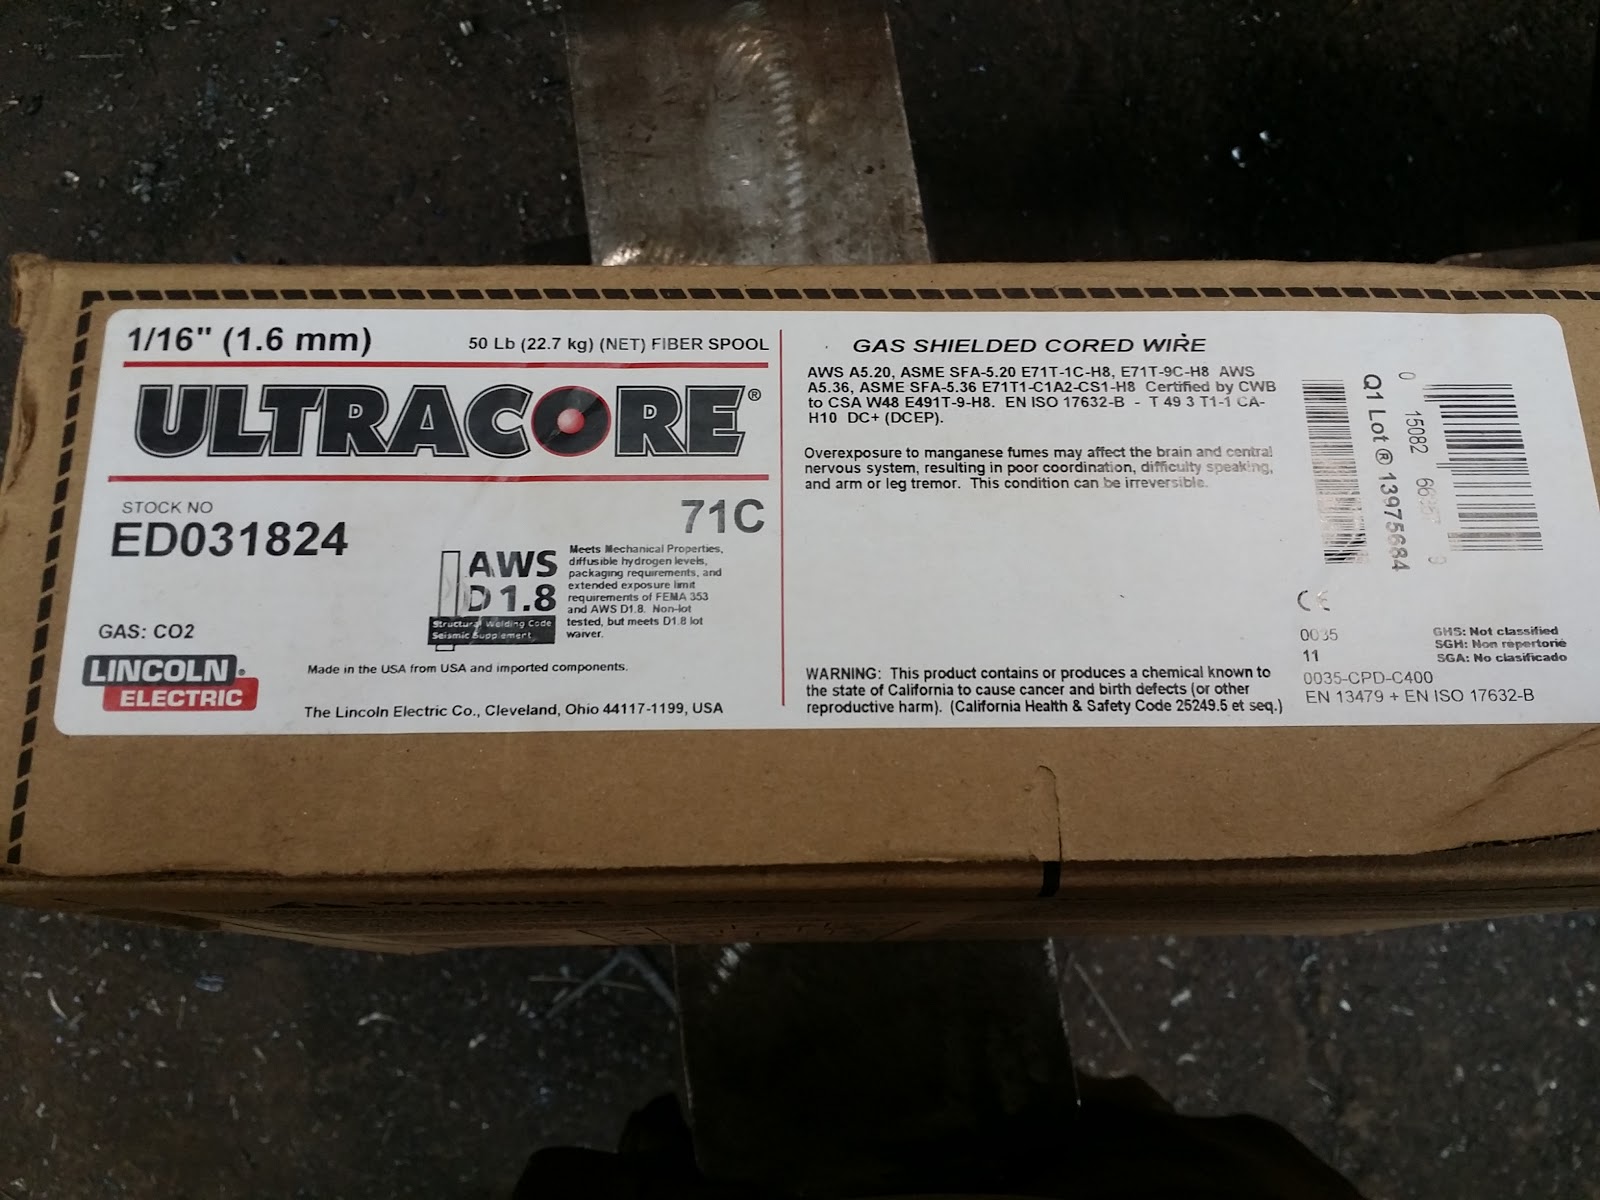 I haven't asked how much one spool costs, but, I know the price would make most industry outsiders blanch.
The wire comes vacuum packed:
 This is a dual-shield wire, meaning it is designed to be covered in CO2 and has a flux built in. Flux, in general, is something that protects welds from oxidation until the temperature drops below a critical point. Flux can also manipulate the weld properties by controlling the cooling rate. It is also an active agent in scouring impurities from the weld. It's complicated and exacting stuff. The wire we use is very good, extremely consistent and batch traceable, etc. It beats the heck out of stick welding got what we do, though it has a lot of limitations. It is designed to only work in the flat position, mostly because of the heat involved. It just drips away if you try to run a horizontal or vertical bead. Welding between 225 and 350 amps will do that. Heh
Anyway, back to the spool change. The hardest part of this job is getting the new spool on the spindle. Since this takes three hands and some cat-like balancing, I didn't hey any pictures of that. It comes down to standing on one of the skids, wrapping the whip around a leg clamping it in place with the other leg, lifting the 50+ pound spool over my head and sliding it over the spindle all while not falling out dropping the very expensive wire and lastly not forgetting to put the lock collar on . . . That would be ugly if the spool fell on top of your head while welding. It would likely ruin the weld and you'd have to grind it out and start all obey after you get over the concussion . . . Right. Anyway, continuing on . . .
Feed the wire down through the yippee guide:
 Flip the cover open and unlock the drive rollers:
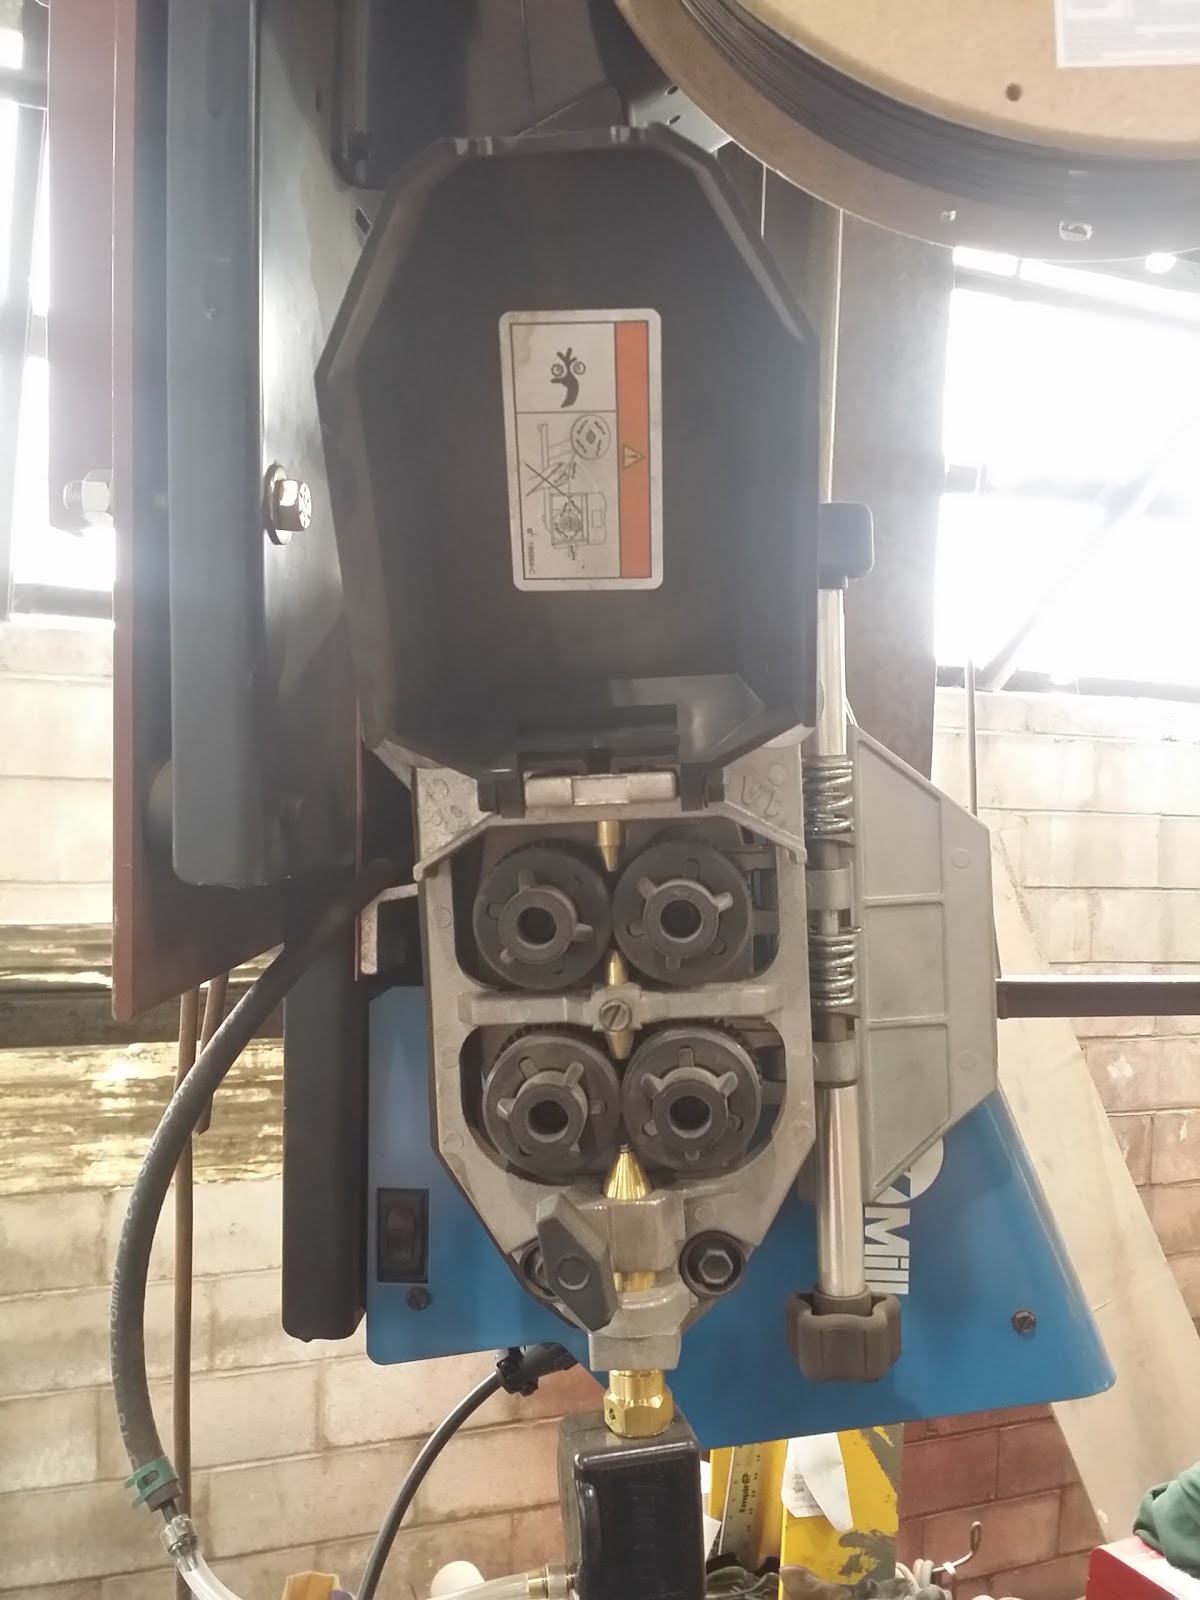 As you can see, this feeder and most industrial wire feed mechanisms employ a multi-roller system. This both smoothes the wire feeding process and makes for a very aggressive and reliable feed, which is extremely important for any sort out wire fed welding application.
Slide the movable rollers out of the way:
 Feed the wire through the guides and lock the rollers into place:
 Here's a really crappy back lit photo representing "done:"
 Oh! Before you feed the wire through the whip, don't forget to take off the contact tip:
 Clean it up when you put it back on:
 Clean out the nozzle, too:
 Ready to lay down some fat, fine filets!

The wire comes vacuum packed:
Anyway, back to the spool change. The hardest part of this job is getting the new spool on the spindle. Since this takes three hands and some cat-like balancing, I didn't hey any pictures of that. It comes down to standing on one of the skids, wrapping the whip around a leg clamping it in place with the other leg, lifting the 50+ pound spool over my head and sliding it over the spindle all while not falling out dropping the very expensive wire and lastly not forgetting to put the lock collar on . . . That would be ugly if the spool fell on top of your head while welding. It would likely ruin the weld and you'd have to grind it out and start all obey after you get over the concussion . . . Right. Anyway, continuing on . . .
Feed the wire down through the yippee guide:
Slide the movable rollers out of the way:


