Tag Line

"Built Dam Strong!"
Showing posts with label custom workbench. Show all posts

13 October 2012

Finished the third workbench!

Today was a darned productive day. Here is the highlight of today's work!

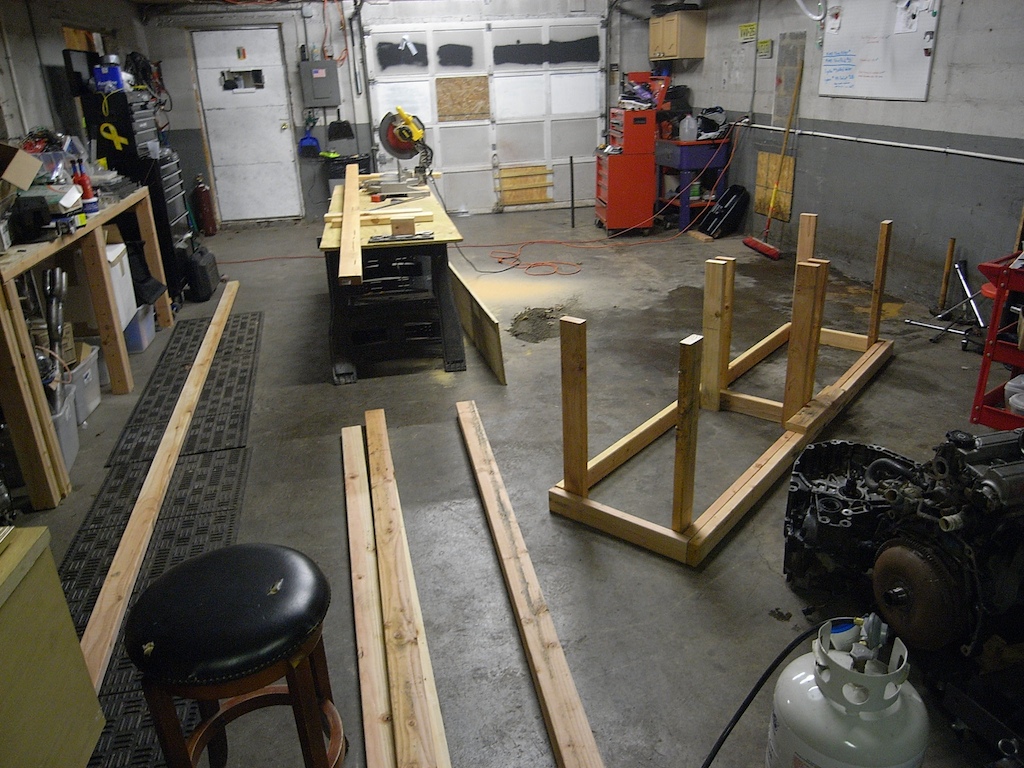
I finished the middle support section of the worktable and then flipped the top upright to start assembling the base: 


I had to make this spacer to spread the legs to the correct distance:


After taking things apart and fiddling for a while, I manages to make everything line up pretty darn well:


A little while later, I screwed on the top:

And yes, I pre-drilled every single hole on the whole top:


That was a lot of screwing. LOL!

Wait! Where did it go?

Oh! Here it is:

It will take me some time for me to figure out exactly where to put everything, but I think the basic layout you see of the four machines will stay about the same.

It is finally starting to look organized and not like a completely cluttered mess!


Just a few more things and I'll finally be able to "settle" a bit and not have to freak out trying to find stuff. I love it!

12 October 2012

Third (and final???) workbench construction.

Work progress has slowed down lately, as I am sure some of you following this blog have noticed. A large part of the problem is that everything is everywhere and nothing is really in place, so I end up spending more than half my time moving things around in order to find stuff and it really has killed a lot of forward progress and that is NOT good. So, Anthony and I are pushing to get the shop cleaned up and organized. A big part of doing that is constructing a third workbench that will be come a semi-permanent home to tools that should be mounted on a bench. 

You'll notice (eventually) that the design is completely different than the previous two workbenches I designed and built. This was partially because we had a bunch of leftover 2x4s and a hefty piece of 3/4" ply from the old, monster workbench that formerly occupied the back of the left of the garage and also because this workbench will be yanked on and abused in a whole lot of a different manner than the other two workbenches. 

Getting started:

I really enjoyed the sun today. The days are getting shorter, and I soak up as much of the sun's rays while I can.

After a whole lot of thinking, measuring and cutting, I had figured out pretty much how I would make everything work:
 Note: this is completely designed in my head, on the fly with no real plan of WTF I was doing. I made changes along the way and made a few mistakes, but, overall, this sucker is going to be pretty darn good.

Another pic of the structure coming together:

I decided to use the ply to build the upper structure on, since I checked it and it was actually pretty square:

The upper structure is nearly complete:

I don't like to work past 9PM during the week, so that is where I ended for the evening. This will get finished tomorrow and that will let me get my most used tools in place so I can finish wiring in the outlets to actually power everything without having to trip over extension cords or even take the time to unplug one tool and plug another one in. If you think that doesn't take long to do, it really doesn't, but if you take half a minute each time and spread that over the whole day, at least 30 times, it adds up to minutes each day that can be spent working instead of throwing a switch and getting crap done, since you have to put down what you are working on move to wherever the next tool is, un-plug, plug in, switch on, pick your thing back up and then switch the next tool on. Yech.

Some other things worth mentioning:
-I pre-drill all the holes. This works soooo much better. The wood doesn't split, the screws grab better and the whole thing seems to come together with less tweaking needed.
-The bench will sit at 31" tall. This is much lower, but for a reason. Since all the machines that I will be working with are at least 3-4 " working height to add to that, putting everything at a comfortable working height, which is important for keeping your back intact when working every day with your machines and tools.

More tomorrow!

23 September 2012

Finished the second workbench and moved a lot of stuff around. Again.

Here's the second bench in place:

The second bench came together a LOT better. I improved on the square and plumb of the thing, and there are no gaps or anything with this one. One of the reasons why this one turned out better was that I  pre-drilled all the holes before screwing the pieces together, making sure that everything didn't pull all crazy when I put the screws in.

You may also notice that my tool box is next to the bench after I removed the upper cabinets. That should be it's permanent home.

Here's the other side after we cleaned along the wall:


Along the back wall:
The monstrous workbench that was there (with the mini-motorcycle on it) was broken down as it was too tall, too wide and blasted together with too many big framing nails.

I moved most of my stuff from the right side of the garage to the work benches:


Cleaning up the rest of the stuff:


Moving sucks, but at least we're making progress!

Due to some oopsing on my part due to a material change (getting 16' 2x4s instead of 8' or 10' sections), we have more than enough leftover 2x4s to make a third bench, though I will take a few inches off the height since I will be mounting my bandsaw stand, sander and other tools, so the working height of the bench needs to be lower to get the work at the right level. 

19 September 2012

Workbench Wackiness

Taking a pile of lumber and turning it into something useful is NOT my forte. My design has been criticized. Just wait until the execution is seen. LOL!

I set up a work station using one of the top sheets of plywood and some saw horses:


I pulled up the drawing on SketchUp:

And started cutting:
I marked everything "WB1" and "WB2" for the work bench 1 and 2.

Many much more cuts:

Notching the support beams:

Starting assembly:

Frame mostly intact:

Got the top sheet on:

. . . with a gap:

It's not perfect, but, honestly, I really don't like working with wood, so I think this is pretty good for a first time building something. I've already got stuff figured out how to make it nicer for the next workbench that will get finished up tomorrow.

Here it is in place:


Anthony grabbed my vise and sat it on the corner saying, "NOW it is a workbench." heh

I don't think that the vise will go there, but we'll see. heh


One less than ideal thing about the garage is water infiltration:


We just have to be careful what goes on the floors. I want to see what is driving the water coming in. Anthony said it is only rain AND wind that seems to cause issues, but I'll take dealing with this over not having a work space. heh

16 September 2012

New digs.

I've gotten 99% of everything moved. It's totally a mess. You'll see!

This is the left bay of a two bay garage:


Wood for the new workbench:

Simple stuff, really. One sheet of birch ply ripped in half, one 2x6x12' and a bunch of 2x4x16' sticks:

My stuff taking over the right bay, for now:

Most of the stuff on the floor is mine. The shelves are filled with Anthony's stuff.


I've been slowly acquiring more clamps, and while I am going to be modifying this rack thing, it is useful to house everything for now:


We're going to find a place to move the bikes and tires someplace else for now:

And I got my TIG unit wired directly to the breaker box with a 30A breaker, which is way more than I'll likely ever need with the efficient machine I have:

That's it. Lots more organizing to do, a workbench to build, and more paying work to do/finish this week.