Tag Line

"Built Dam Strong!"

29 May 2012

PVC and Biiiiiiiiig sharpies . . .

Every once in a while, I'll find out how badly I've been stuck under a rock. Case in point: 


The Sharpie Magnum. I was at Home Depot picking up supplies for the next project, and while I was walking through the tool aisle looking for blue Sharpies, I laid eyes upon the biggest, baddest and most awesomest Sharpie I have ever seen! I just had to get one and see what it was like; if it could fulfill my every dream of marker perfection!

In that regard, it isn't and doesn't, but it is certainly super useful. The Chisel tip, as you can see below is really well designed allowing you to mark a HUGE swath, a BIG line or a PRECISE mark just depending on how you hold it. 


If I find out that they make this thing in blue, I'll never buy another type of Sharpie again!

Now, here's a pic of what I was working on today:


I mostly used my camera, file, sharpie, machinist's rule, mini tape measure, a reciprocating saw (off camera at the time) and the PVC bits. The black bag is full of magic, though. It's one of my most useful sets of tools. LOL!

So, what is all the stuff for? Mocking up Pete's twin scroll turbo manifold! If you recall the picture I posted a while back of the really nice looking GT3076R? Well, this is the start of a manifold for that!

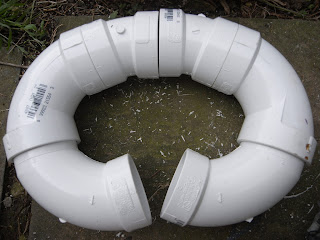
Pete and I decided that a Schedule 40 1.25" pipe would be the best bet for the manifold, but, I was doing some math and I found out that 2" schedule 40 pipe has nearly the same CSA (cross sectional area) as two of the 1.25" pipes. Since this is going to be a twin scroll manifold, why not keep the CSA constant after the primary merge? So, that is what I am going to attempt to mock up in PVC, since it is cheap and easy to work. 

Lets get to work! First up, knocking down all the casting ridges on the PVC, as you can see here:


Now you might ask yourself, "Self, why the heck is he bothering doing something as anal retentive as that?" The answer is pretty simple! Taking care of those ridges will allow the fittings to fit flush, in necessary, which will make measuring and fitting more accurate and precise. Granted using PVC isn't exactly the most accurate way to build a template for this, but, I am mostly using it as a good visual aide   an to figure out approximately how many bends and how much pipe I need to buy in order to finish a manifold of this sort. This will ultimately lead to a more succinct design process with less overall headaches, even if some of the dimensions change. This will also allow me to see a real, physical model in 3D, and hopefully will allow me to package the whole thing much tighter as a result, which is a huge concern given how tight the engine bay is of the car this whole mess is going to go in to. 

After I filed down the casting flash, I started making some spacers to hold bits and pieces together:


 I won't be gluing things at all, so I made sure to keep the tolerances pretty tight for these things. Holding a tolerance of under 1/32" with a reciprocating saw is pretty effing good, I'd say. I also cleaned up and deburred the rough cut edges and kept everything as flat as possible.


This is the kind of fitup I am after:

The spacer is nearly perfectly snugged to the cast in edges of the elbow.

Everything fitting together superbly:

The main U is made from one 2" street elbow and one normal elbow.


 The upper part is a 22 1/2"* elbow, which I like very much and may get some in the 1.25" size, also, to keep turns nice and easy for the trickier bits of running the inner (2nd and 3rd cylinder) primaries to their merge. 

Here are the ready to experiment secondary pipes:


 As always, more to come in the next few days! =)

28 May 2012

It just keeps pulling!

Justin FILLY got me a video of him driving the car! The good bit is towards the very end if you are impatient, but, geez! Remember: This is open header, no exhaust!


It just KEEPS PULLING! 

23 May 2012

Cardboard conundrum, or Poor Man's CAD

Today I spent some time getting down and dirty with cardboard. If you're on the internet, I am pretty sure you've heard about CAD, or Computer Aided Design. It's really rad and all, but, for many people who build stuff, it is still out of reach other price wise for software, or, in my case stupidity. (I've never learned to use any of it.) There is another alternative, however, that works better for many people, especially if you like to get hands on and try to make things work, or, if you have something that you only need to make one of and that one thing has to fit on something that wasn't made with particularly tight tolerances, like Mike's bike, for instance.

I will say today was semi-embarrassing. Well, it is only embarrassing if I tell you about it, which I am going to so that makes it embarrassing. What shouldn't have taken more than a couple of hours took me all day. Being out of practice sucks, and not being with the tools I am normally accustomed to have to aid me in my pursuits. Enough excuses, on to pictures!

I started with the battery tray, since that needed to be set at a depth that would allow for a maximum of 60mm or so for the battery and electronics:


This also led to the first of many revisions to my measurements. The gap you can see on the sides of the straight up and down piece were too great and with the next version, I tightened that up considerably. 

Lots of scribble, lines, and mistakes that all get confusing:


But, after cutting the right pieces out, I end up with this:


Very minor profile! The gap there is from the thickness of the cardboard hitting the brackets. I might have to make a slight trim on the actual metal, but it is nothing more than about 4 seconds with a cutoff disc won't cure. 

Here's the interior of the battery tray:


Plenty of space for whatever Mike wants to stuff in there. 

Here is a view from the other side: 


I didn't get a lot of in-progress pics for the next part because I was busy and email cell phone pics to Mike to clear up some concerns I had with how things should fit around the tank. 


One of the reasons why it took so long to do was that I discovered that with the tank in place, it was impossible to get the seat pan as close to the tank as Mike wanted while having the top of the seat be completely flat, as if you look from the side, there is a lip that comes off the back of the tank. So, I raised the front support for the seat (I didn't grab pics of that, oops) by a 1/4" and that gentle slop raised the front of the seat pan enough to clear the tank. Also, in the side view pic above, I had to slowly trim back the front of the side sections in order to clear the lip. Lots of back and forth and fit and test and cut and draw and cut. LOL!

Before I get too far ahead of myself, I should explain a bit more about what is going on. Mike wants the seat low and lean, to keep the lines of the bike flowing with minimal visual interference. The custom hoop that I installed a few days ago is part of that design. Looking, well, staring at the bike when I first got it, I saw a natural break in the supports for a seat pan. What I envisioned was making the front section (as you see above) then making the rear section (as you'll see following this mess of text), joining them together at their vertical supports in the middle. This would make the seat stiffer and the metal easier to handle. (Separate pieces are easier to move around, cut, form, drill and weld on than larger, bulky and floppy pieces.) With that being said, it's time to move on to more pictures.

This is a support I made for the template:

The longer piece that is inline with the frame is not going to be in the final seat. I just make it to prevent the cross-brace from falling over. heh 

There was a huuuuuuge gap in pictures again, but here are the final ones:


My brain is so rusty. It took hours to figure out the rear section. What happened was I wasn't using the correct radius for the ID of the bent tube for the hoop. I was using the centerline radius (4") instead of the ID radius (3.75"). UGH! I wasted a lot of cardboard and time. BUT . . . I got it figured out!


I don't have a ring roller (yet) so rolling that ring for the rear of the seat is going to be tricky. I have something I want to try with my newly acquired bead roller (thanks again, Mike!) to mimic a bead roller. Since I am only dealing with 18g steel, I think it will work. Time, and this blog, will tell.

Side view of everything mostly in place, though not everything is seated as it will be:


And the final pic for the evening:


As much as this was a pain in the butt, I really enjoyed the work, even the frustrations of it. My brain was actually working (though creaky and in need of lots of WD40). It is so hard to describe the joy I get from doing this kind of thing, and that is why I want to keep doing it, constantly improving in everything I do. I love these kinds of jobs, as I get to learn-relearn, improvise, adapt, overcome and ultimately bring something into this world that was previously only a dream or a sketch or a thought or simply a desire. Mike said "I would go so far as to say I'm alarmed at how perfect that seat is to what I envisioned." That's the kind of work I try to do.

Now let's see if I can translate that mess of tape, cardboard and pen lines into a functional version in metal that will be enjoyed by Mike and probably his wife. I can't wait! =) 

22 May 2012

DOHC ZC flanges, tri-y headers and some good tips for V-band flanges

I thought I would grab some detail pics of the DOHC ZC flanges I got in!

Here is one on top of the C-channel piece I got to do header fab from:


Laser precision!


Once the header gets made, I will flap wheel those marks out and smooth it up, and given how nice they are, it shouldn't take long at all!

Today I got a lot done, though I had to take a huge step back because of a glaring mistake I made, but I definitely made the best out of the situation and am really stoked about the next few days!

Here's the tubes for the smaller of the two 4-2-1 headers you may have seen in the background of some of my pics:

I had just finished sanding them. I wanted to attempt to get into the "crotch" of the first 2-1 merges, but, as you can see . . . that wasn't gonna happen:


Welp, it's only metal. Time to cut and paste!


I then took the time to wire wheel the whole setup. The pieces came out really good looking!


This is a weld from when I welded the merges into the whole collector:


I love the way brushed steel looks!

This is an process photo of setting up my ghetto rigged welding "table:"


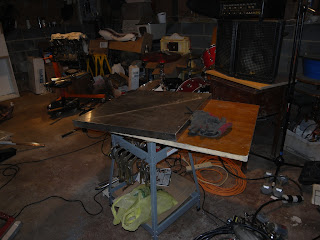
Yes, that is a half a door with a stainless shelf I liberated from a recycle pile. I clamp my ground lead to the shelf and it provides a really decent ground for anything placed on top. I use a wire wheel to break up the oxides on the surface a bit each time I use it, and that really does help make better electrical contact. 

Enough talking, more welding!

Here is the start of welding up the v-band onto the tail of the collector:

You'll want to note that I actually extend the pipe through the collector a bit:


(More on why in a few more pics.)

Best part of the weld on the v-band:

Inside the pipe, yes, that was cleaned up afterward:


Now here's the flange without the other half on.


Welding the v-band flange like that does a few things for you:
1. Self-indexing connections are easier to put together by yourself.
2. The connection will seal better, as there is no split at the joint of the flanges.
3. Welding with the whole v-band assembly together helps prevent warpage. 

Overall, this is a much better way to do things as long as you have the extra space to do so. Just make sure you leave enough of the other side's flange to get a good weld onto the exhaust tube. 

Next, I welded up the "crotches" of the primary merges:


Then, to correct for lack of proper equipment, I welded on slip-fit rings onto the primary merge legs

Mockup:


(Note, the sanded portions of the slip fit rings! ALWAYS clean your metal. ALWAYS)

Getting things started off RIGHT!


Still have a lot to learn about welding this stuff, but I am definitely getting better. 


After the slip fit rings were welded on, it was time to re-weld the primary merges to the rest of the collector. I chose to gap these welds, and used my handy-dandy body panel clams to space everything correctly:


DONE! 


I love the way that thing looks. 
Here's a closeup of the welds in the middle:

A friend of mine who is a very excellent welder told me to try using thinner filler. I will certainly do that. I'll also try a few other techniques for joining this thin tube that he mentioned. (Thanks, Remo!)

Now that the collector is 99% done (there is actually some porosity in one of the welds that I am going to cut out and weld over. I have no idea WTF caused it, but it might just be an odd spot in the metal which happens on occasion), It's mockup time!


The collector is easy to hang by itself, but when you add this stuff:


It gets a lot harder to manage by one's self. 

Another view on the ground:


In place, sort of:


This being my first completely from scratch header build, I have run into some issues. LOL! Since I cut the collector apart, my primary tubes are a bit off, as you can see in the next two pics:


The simple solution for that is to cut and past, again. heh The problem is that I need to get the collector in place first and it needs to be on something solid. I will have to build a fixture for it in order to keep everything where it needs to be. My primary concerns are getting as close to the oil pan as practical to maximize ground clearance, and to make sure that the header ends in a spot that will actually fit in a car.
I oopsed that with Justin's headers, because he wanted it tucked TIGHT to the pan, and I ran it straight back from the corner of the pan instead of the middle of the pan, which lines up better with the center tunnel of the car.

Whew . . . what a long post. It was totally worth it. I really enjoyed cleaning up after today. The next header I build in the coming days and the battery tray and seat pan I am going to fabricate are going to push me to new levels of pickiness. I just want to make sure the people I am doing work for are satisfied with it! I always want to do the best job possible.