Tag Line

"Built Dam Strong!"

28 September 2012

Today was a pain in the . . . everything.

Today, my TIG welder decided to throw a temper tantrum. I'm thinking that something might have gotten knocked around when I moved it to the new shop. I've eliminated just about everything else and have finally gotten some decent beads.

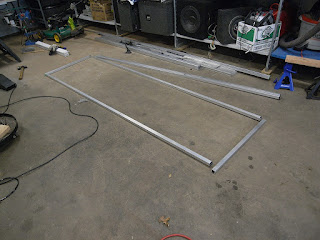
First order of business, the sign holder frames:


Hmmm . . . I wonder if the floor is level?

Yeah . . . Of course not. heh

Solution:
Using the plate and flat-face clamps keeps the pieces generally in place. Also, I am welding the sides as per the customer's request so he can fit poles or fasten attention getting things to the sides of the sign holder. Normally, I don't leave ends open.

First one welded together:


I got the second one welded up then moved on to making sure all the pieces I have fit together correctly:

I took a break and wanted to figure out WTF was going on with my welder. For some reason, I was getting a LOT of crud in the welds even after sanding, acetone, wire brushing with a stainless steel wire brush only used for aluminum and then acetone AGAIN. I checked my ground connections, torch connections, gas lines, adjusted gas pressures, played with the frequency and balance, found this:


moved up to 1/8" tungsten (thought I am not a fan of the type I am using for aluminum, but it works decently enough it seems) and after all that, I FINALLY started to get something resembling decent:


I got a bit hot on this joint:


The sign frame is going to get welded into the slot formed between the upright angles and the tab welded to the end of the box:


First on the right, last on the left:

Much better color on the last one, showing much improved weld quality:

Funky 1/8" tungsten:
 Odd color, but a really nice ball at 125A dialed in, so it isn't all bad. 

27 September 2012

Aluminuminuminuminum.

More layout! I figured out how to use the 4" wide cuts of the 3/16" plate to make the swing arm support plates:


I make too many mistakes to point out, but I happened to get a pic of this one:
I eventually got my head wrapped around where I didn't screw up on the last one. LOL! 

I busted out my handy band saw and stand to cut the pieces out:

Then I stacked them, marked them and pilot drilled them:

After that, I cleaned up everything with a wire brush and got the first piece fit up:

I had some issues when getting to welding. This was the first time I had gotten my TIG welder running since the move. I was expecting the aluminum to weld pretty effing clean, but . . . surprise surprise surprise! No. I actually had quite a lot of issues getting welds started, and this was after wire brushing twice, cleaning with acetone and making sure I didn't touch anything with my bare hands.

Problems aside, I can't complain about this:


Notice the void:
That isn't in a critical area, so I am not worried too much about it, but it certainly is annoying to me. I've had crap cast aluminum weld handle better than this. heh

Here's the crud after a pass, before wire brushing:

 I love brushed metal finishes:

One pretty darn good run :

Everything is matching up really well thanks to good prep and a solid plan:

The tube is thick enough to not have had any bubbling on the inside:

My little setup, for now:

I need to finish this project up tomorrow. That's the plan, anyway. heh

25 September 2012

The 7 P's of preparedness.

"Proper Planning Prevents Piss-Poor Performance." 

That is something one of my sergeants in the Army was fond of saying. Why am I bringing this up? Before you do ANYTHING, have a plan. I don't mean "Have a plan that cannot change no matter what," as that is rigid, inflexible and will only lead to your head hurting. 

So, you want to build something. What purpose does the thing serve? What loads will it see? What functionality does the thing need to have? How much space will it take up? What are the size constraints for moving parts? Is weight a concern? 

All of these questions and more should be asked of yourself or your customer. Here you can see a pile of aluminum that was purchased after doing a CAD drawing with the express purpose of figuring out how much material to buy:


I got the saw horses out and laid out the first pieces to cut:


When you buy material, NEVER assume that lengths are the same:

If you were relying on these ends to all match up to make something square, you would fail horribly. NEVER ASSUME. ALWAYS MEASURE!

I marked the correct length on two sides of the box tube:


Chop chop!

Making good progress:

Stacking all the like parts together:

I was getting tired after a very long weekend full of lots of traveling and busy-ness, so I stopped cutting after I made most of the major cuts. The last thing I did was bust out the biiiiiig Sharpie:


And marked up all the surfaces I will be laying out lines for holes and trimming pieces to fit:

Ready for final layout in the morning:

24 September 2012

What does the scouter say about his power level?


IT'S OVER 9000!!!!!!!!


I wasn't expecting to reach that level of views in such a short period of time. Thanks for the interest, the feedback and taking the time to read my drivel. 

23 September 2012

Finished the second workbench and moved a lot of stuff around. Again.

Here's the second bench in place:

The second bench came together a LOT better. I improved on the square and plumb of the thing, and there are no gaps or anything with this one. One of the reasons why this one turned out better was that I  pre-drilled all the holes before screwing the pieces together, making sure that everything didn't pull all crazy when I put the screws in.

You may also notice that my tool box is next to the bench after I removed the upper cabinets. That should be it's permanent home.

Here's the other side after we cleaned along the wall:


Along the back wall:
The monstrous workbench that was there (with the mini-motorcycle on it) was broken down as it was too tall, too wide and blasted together with too many big framing nails.

I moved most of my stuff from the right side of the garage to the work benches:


Cleaning up the rest of the stuff:


Moving sucks, but at least we're making progress!

Due to some oopsing on my part due to a material change (getting 16' 2x4s instead of 8' or 10' sections), we have more than enough leftover 2x4s to make a third bench, though I will take a few inches off the height since I will be mounting my bandsaw stand, sander and other tools, so the working height of the bench needs to be lower to get the work at the right level. 

19 September 2012

Workbench Wackiness

Taking a pile of lumber and turning it into something useful is NOT my forte. My design has been criticized. Just wait until the execution is seen. LOL!

I set up a work station using one of the top sheets of plywood and some saw horses:


I pulled up the drawing on SketchUp:

And started cutting:
I marked everything "WB1" and "WB2" for the work bench 1 and 2.

Many much more cuts:

Notching the support beams:

Starting assembly:

Frame mostly intact:

Got the top sheet on:

. . . with a gap:

It's not perfect, but, honestly, I really don't like working with wood, so I think this is pretty good for a first time building something. I've already got stuff figured out how to make it nicer for the next workbench that will get finished up tomorrow.

Here it is in place:


Anthony grabbed my vise and sat it on the corner saying, "NOW it is a workbench." heh

I don't think that the vise will go there, but we'll see. heh


One less than ideal thing about the garage is water infiltration:


We just have to be careful what goes on the floors. I want to see what is driving the water coming in. Anthony said it is only rain AND wind that seems to cause issues, but I'll take dealing with this over not having a work space. heh