Tag Line

"Built Dam Strong!"

31 January 2012

I actually got a bunch of welding done yesterday! (Justin, this pertains to YOU!)

I was going to upload these pics and write up a post last night, but I had a wicked headache and went to sleep very early and slept it off. Meh. I am mostly fine today, so, here's a quick and dirty lunchtime (PB&J with clementines!) update!

I welded up the new downpipe and the divergent and convergent cones for Justin's Bisi header that I have been working on:


I don't have many pics of the process, as it required both hands to hold things in place while tacking the pieces together, and after that, I just welded stuff. LOL! 

I am finally starting to see something resembling beads that I really like:


That's as far as I got with that, but welding all the pie cuts took a good long while. I didn't grab any inside shots, not because I am afraid to show what they look like, but because I forgot. I got interrupted by helping my friend move some cabinets he sold to a dude, which frees up more space for me to work in and actually set up a little shop area. I'll eventually be able to have one section of the garage to call my own and not have to disconnect every freaking thing and then reconnecting it every time I want to set up. Hurray for eventual efficient working! It takes me over half an hour just to get things set up and ready for working. After setting up a little work shop area, I will be able to get more work done during the little time I have there. That is very precious to me! 

The next thing I worked on was taking this:


Which is an Acura Integra dual ben shift lever; then doing this to it:


(That's not the same shift lever as in the first picture, but I forgot to get pics of that one after I chopped it to bits.) And then, welding the extended bits onto the stock parts, like so:


In order to make the final product look like this:


Why? Putting the shift knob closer to the steering wheel greatly reduces the time it takes to complete a shift, and increases the time the driver's hands are on the wheel. Both of these things are excellent for drivers who value the details of making the car faster and safe. It looks ridiculously long, because, well, it is. The customer asked that it be positioned to a certain height, with the bend placed a bit farther back and towards the seat. Mission accomplished.

And here is something you won't see on a lot of other people's blogs: Mistakes. I am not perfect. If other people can learn from my mistakes, then I won't feel so bad. 


Look at where the feet are. Look at where the cross supports are. Yeah . . . The outside dimensions of the base for the welder are dead on to what I wanted for it. I wanted a good amount of overhang on the front and back to protect the hose and line connectors. The sides have a bit of overhang so I could make it easy to lift the welder up and out (if I need to move it) when I add some odds and ends to the sides of the cart. So, I measured the outside of the box, came up with my plan, then executed it pretty darn perfectly. But I forgot about the dang feet. In fact, I never even looked at the bottom of the welder. Dur.  So, I have a couple of options. I can cut the supports out and start over, or weld in some new supports. Given limited material, I am not going to waste material and make the cart heavier by welding in new angle. I have some 1/8" strapping I could use, but, I'd rather not "waste it" on correcting a mistake. One thing that makes me pause from doing that is that if I cut the supports out, it will twist the frame. It's pretty effing square right now. (I had to learn to make things square within 1/16" while I was in the Army, or my "boss" would kill me. It pays off, for sure, since a lot of guys can't even keep things within 1/4" on small stuff.) I might just weld on some strapping and call it a day.

Another possibility is putting a plate on the top, but . . . I don't have the sheet metal, and the feet would still need support unless I go with way too heavy plate. I also don't like plates, as horizontal surfaces collect dust and dust isn't good for the insides of the welder. I prefer to keep things open, or with grating/thick mesh, as that cuts down on the cleaning you need to do. Since I've worked in super dusty environments (I will post up a pic of some sand in the air eventually), I know a few things about keeping equipment functional. 

The reason why my material selection is limited is that I am using an old bed frame I got for free off of Craig's list. I love (almost) free stuff. I have to find a few more to complete the whole thing, but I have enough from one frame to get the basics of the cart made up. I also scored some free hard rubber wheels so this sucker will be rolling pretty eventually. =) 

And that is my quick lunchtime update. =) 

28 January 2012

I dislike electric vehicles immensely.

Batteries, as they are now, are, in my not so humble opinion, sucktastic. Their energy density has been increasing lately due to new formulas for the bits and pieces of them, but, since most people don't know or care about where the batteries come from in their devices, they don't understand just how absolutely disgusting the manufacturing process is for the batteries really is. Look it up sometime, especially if you are considering a moronic hybrid car.

That being said, I find much of the technology used to or being developed to bring greater energy density and storage ease highly fascinating. Take for example, this link I found accidently:

MIT "neeeks" (nerd geeks^3) (and yes, that's my own, nearly trademarked word, just so you don't forget!) figure out a completely new design for batteries that actually doesn't really suck.

A conveniently "re-chargeable" (more like re-fillable) battery makes much more sense than all the asinine attempts at having a practical, useful, and even a less environmentally deleterious vehicle.

Why do I dislike electric vehicles? Let's list some reasons (but in no particular order)!

1.  Electric vehicles are a buzzword. Some of the first vehicles that can be considered automobiles were made in the early 1800's. Yeah . . . Wrap your skull around THAT one for a while. These were usually no more than electric powered carriages retrofitted with crude batteries (as the chemistry was not well understood at the time) and electric motors. That being said, they were relatively easy to make and maintain, didn't cost too much, and were actually useful in the idiom of the day. So, for car manufacturers today to be vaunting their idiotic engineering nightmares as revolutionary is offensive and stupid. The "buzz" associated with electric cars are "zero-emissions" (which is complete BS), "the future of cars" (I seriously hope not), "Environmentally friendly" (which is complete BS if you look at how the battery packs are made from the mining process to the refining process, and all the shipping in between), and "Finally ready for the mainstream" (another bogus claim).

All this buzz has been brought about by the MICs (morons in charge) of the world who seem to think that changing the energy usage patterns is going to save the world. Government mandates of fleet fuel economy standards, idiotic emissions standards (air is cleaner passing through the engine than entering it . . . ), and basic misunderstandings of the machinations behind current changes in the global climate (which is NOT supposed to be static, people . . . ) and an overall dislike of the human race (we are a pox upon the planet) are forcing stupid and illogical changes in industries across the planet.

2. Electric vehicles are not capable of keeping up with modern consumer demands, even basic ones. Electric vehicles are touted as perfect for commuters who drive less than about 70 miles a day. That is possible. However, the current crop of crap "commuting" electric vehicles is  so unappealing, you have to be a nearly complete idiot to buy one. Chevy can't even make one reliable. The Leaf is . . . ugh. You can tell that these things were designed by engineers who have no )(#(*$# clue what are car should and used to represent for the American public. (I am not going to speak for any other country's driving populace, since I've only driven mostly in the US.)  I can't really blame engineers entirely, as they are given targets to hit, and those targets are based on mostly two things: mandates from government and perceived consumer desire. Governments seem hellbent on gutting cars and consumers want their idiotic lives integrated into their vehicles with iPod docking, (#$(*#$ apps, talking car interfaces (I personally HATE talking to things and getting answers . . . ), 18 speaker surround sound mega-uber hi-fi (a joke in a car, especially a rattle trap tin can with no sound deadening that is still 300-800 pounds heavier than it should really be), etc. All the extra crap that people "need" in a car is really making the issue of cars becoming throw-away appliances like cell phones, TVs, laptops and other electronics is something I find completely the antithesis of buying a car you love to drive and then keeping it. Forever. Or until an idiot in an SUV nearly kills you because they were messing with their in-dash navigation unit, talking on a hands-free call, while also applying make up or reaching for coffee . . . Anyway . . . Cars are now throw-away items which means that they are worse for the environment than a normal car since you have to deal with a few hundred pounds of battery waste when you try to dispose of the car. Brilliant.

3. Electric vehicles are NOT emissions free. The power to charge their inefficient battery packs has to come from somewhere. Granted, modern power generation plants ARE orders of magnitude more efficient than the chemical to mechanical energy conversion that occurs in modern ICEs, but . . . the electricity still has to get generated. Pushing off the problem to another system, which would also increase demand above the capacity of said system (think about what would happen if the entire US switched to electric vehicles), is NOT sound policy.

4. They are )(#$)(*#$ UGLY! (The Tesla aside, and honestly, the Volt is at least not terribly offensive.) Come ON, people! Even most hybrids are just gross to look at. Trust me, I understand the need for efficient shapes, but . . . ew. Seriously. Just . . . ew.

5. Throwing billions of dollars at developing underwhelming and poorly performing vehicles is killing innovations on systems that are actually sustainable, cleaner, and "greener" all around. What would I prefer to see being developed? Increased electrolysis efficiency to produce hydrogen. Hydrogen storage  solutions that are lightweight and robust. Consumer cars made LIGHTER with LESS materials and less "appliance" mentality. Vehicles that don't suck. No more SUVs for one person driving to and from anywhere. (If you use something like that for work, or have a big family . . . OK. But I actually like and prefer minivans. Yes, I know I am weird.) TRUELY alternative powered cars that aren't dependent on antiquated delivery systems. (In this regard, I totally respect those who make their own diesel and alcohols for fuels.) Easing registration policy to allow for people to make their own darn cars that just don't fit into the "normalcy" models of what a car is. People riding a bike or walking. Car-share programs so people don't have to buy a car, they can rent one for picking up stuff. MORE )(#$()*$# RAIL CAPACITY, especially high speed lines. (The US has pretty much killed all rail innovations and instead of actually putting money towards infrastructure, we get idiotic and self defeating "social programs" that rarely do what they intend to do.) Alternative transportation networks. Etc. heh

Meh. Anyway, before I digress into way too many other topics, I will sum up:

 -Electric Cars today suck. I think they will almost always suck.
-Hybrid cars are completely unappealing to drive.
-The emphasis on electric cars is killing real innovation.
-The MICs who make laws don't have basic understandings of systems, and therefore shouldn't allowed to wipe their own poopy behinds let alone set national energy and environmental policy.

19 January 2012

Video of me driving my Legend

New exhaust sound.

I haven't listened to this on a computer. I can't vouch for the quality or realism at all. I also couldn't really romp on it as I was driving by the town and county offices where all the donut eaters . . . police occifers are based out of. 

Here's a really quick post about Dave's bike so I can get a couple of pics up.

Crappy cell phone pics!

Bike in progress:


Locking collar idea being welded up:


My absence as of late and a new teaser pic of a failed, but awesome project idea.

The past week, aside from working with Dave, learning how to set up a backpurge setup (and use it) and spending some time with my fam before heading back to the grind of College Life, has been not so fun at all.

My daily driver is a 1993 Acura Legend L coupe. It has the Type-II engine (230HP, 210ishft/lbs, stock) with the six speed transmission. I had converted it to the 5-speed clutch and flywheel setup, as the 6-speed setup has a dual mass flywheel (YECH!) which weighed about twice what the 5-speed flywheel (22ish pounds) and clutch weigh. I knew it needed a clutch when I purchased it. The car was in pretty decent shape overall when I got it, but, it seems to attract people (idiots!) who can't park. You'll see all the damage soon enough. Anyway, a week ago, I was picking my mother up from work. On the way home, the car just nosed over. There was seriously no power at all, except for a few instances of about 2-3 seconds of normal power then just feeling like a late 80's Hyundai Accent . . . 

Within a few blocks of home, my mother and I smell something burning. Uh oh . . . I decided (stupidly) to  just limp it home since we were so close. I pulled into the driveway and started investigating. The entire midpipe was glowing orange! Not dull cherry red, not a little bit hot, but melt your flesh off, a few steps from melting down entirely hot. (I've done enough torch cutting and heating to know how close the pipe was to a complete meltdown.)

Ugh! So, I figured, OK the catalytic converter, after 184,600 miles decided to puke its guts, clog up, and go into meltdown mode. FINE! This past Sunday I set about taking the midpipe off. Of course, it wasn't easy. And, it was #)(*$()*#$ cold. The windchill in my area was down towards single digits (Fahrenheit), and I toughed it out and got the midpipe off at 9PM after a long day. After that, my fingers and toes had had enough so I called it quits until the next day. 

Monday morning comes along and I look at the cat in the daylight. 


Look at just how beastly the stock midpipe and cat assembly are! The stock cat was fine. WTF? I could clearly see all the way through all the honeycomb both sides. Just to give you a peak at what I was dealing with here: 


That sucker is BEASTLY! I really didn't need the 2.5" flex pipe on there. I was overly worried about the midpipe. I will be taking it out soon enough, and you'll hear why in just a few moments. 


Here's a crappy cell phone video of my car idling with open headers:

It sounds pretty gnarly! The best an worse is yet to come, though. I figured that since the cat was fine, and that the power loss was intermittent, that maybe the stock muffler had something come loose. Here's the stock muffler:

It's certainly seen better days, and what I didn't get a picture off, it had a fresh bonk mark on the bottom of it, so I figured that was the issue. I got a hold of something I thought would sound pretty decent and not be too annoying:


That's a svelte Dynomax Superturbo muffler compared to the stock muffler. Just a bit smaller, I'd say. 

Here's a not about the stock piping. It is a VERY goo stock exhaust. It's a bit small for the breathing this engine can do, but, it's really not bad at all. It is about 2" ID, with very nice, large radii bends, and what I'll try to show (poorly) in the next pic is how it is even ovaled to accommodate the hanger for the midpipe! Overall, it is much better than many stock exhausts I've seen with crushbent, crap pipes that fall apart in a few years. This thing has the better part of 200K miles on it and, aside from surface rust and a few heat shield rattles, it is super solid! 


Here is a pic of the stock exhaust mounting bracket, that had been slightly modified by the previous owner. (There is evidence the car had non-stock exhaust and suspension on the car at some point, though it was all correctly and excellently maintained and returned to mostly stock.)


Through the miracle of modern machine wizardry, the bracket came off lickety-split!


It took me a while to get something together that would allow me to use the stock piping and the stock exhaust hanger, since I really didn't want to spend even more time cobbling together some hackneyed system from bits of crap I had laying around. I'd rather use stuff I know fits and spend time making that stuff work.

In order to get the muffler installed to the stock pipe, I needed it installed at a slight bend. How does one bend a pipe without a bender? (#**(#$ Pie cuts! That's how! LOL! The best place, I figured, to make the pie cut was in the adapter itself. The adapter I got matched the pipes perfectly . . . but wasn't the slip fit I wanted. So, I first cut out a pie from the adapter, but didn't cut all the way through, and after some careful squeezing and the use of my carefully calibrated SWAG-o-meter, I got this:


That left me with the simple problem to solve of how to make something like this a slip fit. That was easily solved by slitting the adapter down the long side, thusly!


I didn't get any decent views of the welding of everything, as it was dark and starting to drop freezing rain all over. It was pretty effing miserable. I just welded the stock exhaust bracket to the end of the muffler, then used a spare scissor jack to line up the ends of the pipe after getting my modified adapter in place. I tacked it in place to lock in the needed angle and position, pulled the pipe off, and MIGed the sucker on.

The evening was pretty frustrating, as my dad had texted me to ask if I needed anything, and I did. I couldn't find the spare spring bolt things I had bought over a year ago when I originally intended to replace the midpipe. So, I asked him to find those and some 2 1/4" ID (to fit around the outside of the pipes) 3 bolt gaskets. The midpipe flange has a weird offset third bolt, but I just cut that part of the gasket off and it works just fine. (I've had the midpipe off several time for various things like replacing the rear tranny mount. This time it was rusted to heck and took most of Sunday afternoon/evening to get off because I forgot my dad had a Dremel, and mine is located conveniently at my "shop." heh) He graciously stopped at 5 auto parts places. Most parts stores don't seem to carry basic, generic exhaust gaskets anymore, or, they just don't )(#$(*$# know what you are talking about. My dad found some, but he brought 2" ID gaskets . . . which I didn't want to bother modifying to fit since they would be very thinned out and not even worth using at that point. I gave him a big hug, thanked him, then sent him on his way. He really is an awesome dad, but . . . sometimes all you can do is shake your head and smile. 

Anyway, while I was waiting on the gaskets, I installed some new spark plugs. I found one leaking spark plug tube seal that I will need to replace this year. The plugs looked pretty decent otherwise. Gotta love COP and an excellent intake system that flows darn evenly to all cylinders. (The Type-II C32A6 has a variable length intake manifold. It actually switches twice, so you have three intake tract lengths, and MAN do they work! The engine sounds like it goes to 11 at about 4,500RPM!)

Here's an in the middle of the job pic:


I also took the time to change the tranny fluid and also changed the engine oil. I was so tired at that point that I forgot to change the dang filter, but . . . more on why that wasn't a bad thing at all, shortly.

I bolted everything together and in place, dropped the car off the stands, fully anticipating everything being fixed, and started the car up. I was greeted with a throaty idle, but it was still idling poorly. It had no throttle response at all. And . . . it was running pig, fuel drenched rich. Ugh. WTF? By this time, it was after midnight, the freezing rain was getting worse, so I just got everything out of the rain and went in to warm up and look through the manual. A friendly neighbor who is really awesome with cars was actually coming back from vacation and heard the car. (He's very good at troubleshooting stuff as he's been wrenching for his whole life.) He asked me if the car's MAF sensor was bad, as it sounded like a car with a bad MAF sensor. It seriously did. (I've helped fix a few MAF sensored cars before.) I told him it was speed density, as all Hondas pretty much at, and he said "OK, you probably want to check your intake air temperature sensor." So, I looked up the specs on the sensor in the morning and figured that it should read about 4-5KOhm at the ambient temperature, and measured it. 2.3KOhm. Oh, WTF? It was in the -20 to -30*F range. Duh. I also pulled the codes from the ECU and got a code for ignition signal output. 
I had a spare IAT sensor from another manifold, and swapped it in. This is the old one as I pulled it from the manifold:

Yeah, maybe that is a problem . . . =( I also was asking myself how in the world it got that mucky. I soon found out. The car had come with a SRI (Short Ram Intake) and filter. I never paid too much attention to the filter as it looked OK. Well . . . that was stupid. It wasn't doing jackall. The intake tube had dust inside of it, especially the outside of the turn before the throttle body. The valve cover vent from the massensger side is also drawing too much oil through it. (It's good for crank case venting, but, not good to have that much oil getting drawn into the intake manifold. Oil vapors are bad for the engine!) The throttle plate was gunked up. Ugh. Shooting myself in the foot, for sure.

I reset the ECU, cleaned everything up, walked to the local parts store and picked up a K&N filter with a nice radiused inlet (much better than the old filter's crap design), installed the new air filter and then tested some vacuum lines (of which there are a surprising amount on a modern fuel injected car, as many of the sensors and actuators for systems are remotely mounted) and I found a few slight leaks that were corrected. 

I had also taken the time to put up some shelter, since it was now raining:  


After I started it up, I made sure it was running better, and holy crap did it ever feel and sound good! I then changed the oil (AND FILTER) again, and I was really shocked to see how crudy the oil coming out was. So, having all the fuel in the engine oil really did some good in cleaning up the insides of the engine a bit! Not that I recommend that at all . . . but unintended happy consequences are not a bad thing!

Here's a clip of the idle:


That leaves me with the last issue with the car from all of this: Drone. Holy )#($* does the exhaust drooooooooooooone at cruise and certain light throttle positions. Ugh. I HATE drone. But, I did what needed to be done, and will do what I need to do this coming month (have to wait for my next stipend to come in) and cut out the flex pipe, move the cat up as far as possible and install a 14" Magnaflow 4" round muffler as a resonator. That should help tremendously. If it doesn't kill the drone, I will purchase and install a Dynomax VT muffler, which has a flap inside it. Those things sound GREAT at WOT, but absolutely kill any drone at all when cruising at low loads. It's the best of both worlds!

I may have a couple smaller updates, but, I wouldn't expect anything major like this until early February. 

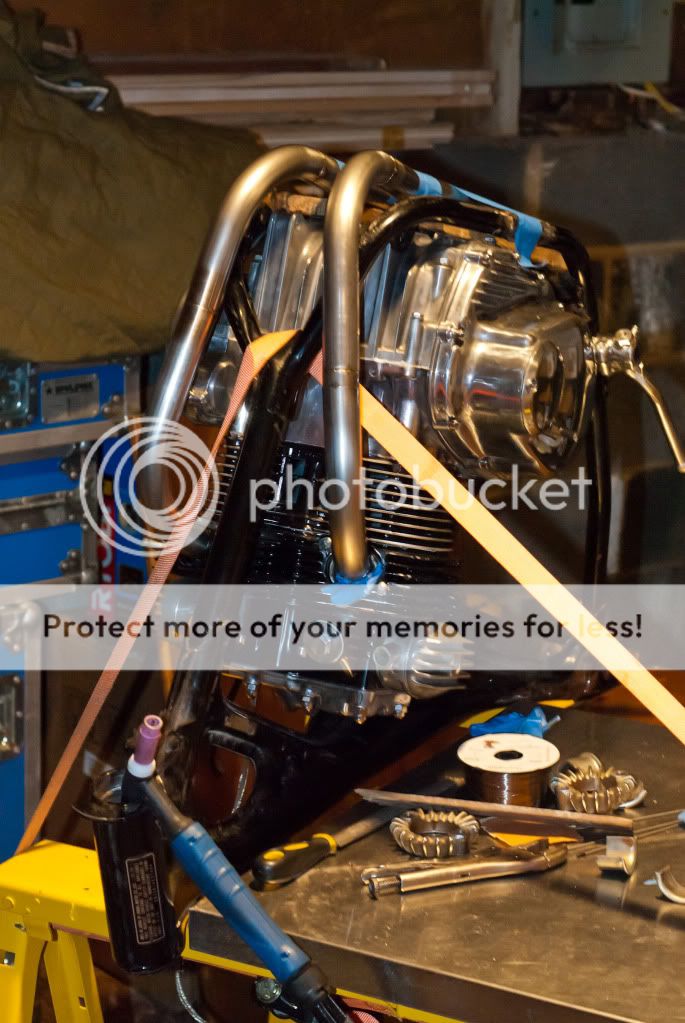
Oh, and Justin, this is why your header isn't completely welded up yet. LOL! 

13 January 2012

The past two days have been weird, busy, crazy with some fun thrown in.

Firstly, my DD, a 93 Acura Legend L coupe, AKA parking target (Driver's side has serious battle scars from people who can't )(#(*$$ park) decided it would like to nearly self destruct. I was picking my mother up from work in the late afternoon on Thursday. On the way back, the engine just looses all power. It barely wants to run. Being close to home, I just nurse it back to the house. Along the last few minutes of the trip, my mother and I smell a rather nasty stench coming from my car. I pull into the driveway and park, starting my investigation by looking underneath, and I was greeted by a site I would prefer not to see on any DD car: the entire midpipe glowing bright, ready to melt orange. (*#&$! The cat puked its guts and clogged. I'll add that to the )(#$(#$ list of stuff to get done before Tuesday. (Classes start next Tuesday.)

Anywa, I am going to gank some pics from Dave, who's motorcycle I am building a header for, along with some other stuff to get it running. The hard parts are already done. Anyway, here are some pics that I've borrowed from Dave until he sends me his copies for my own purposes.


Upside down motorcycle! I am glad we mounted it this way. Everything is soo much easier to mock up when it is in plain view like this.

The collector position was decided and then everything else just started to flow:


Warning, hot beaver action ahead! Look away if you are faint of heart!


And here are a couple of crap cell phone pics from Thursday as I was prepping for heading out to the "shop" for work:

Runners marked up and ready for tacking:

The shorter pair on top are actually the 1-2 runners. They match almost perfectly in length. The longer pair are the 3-4 runners. Again, they match nicely. If I wanted to make the pipes closer in length, I could run the 3-4 pair to the upper legs of the collector and the 1-2 pair to the lower legs of the collector. I'm OK with a mis-match. This is all about experimeting! 

Now here is a picture that is really terrible and needs some explaining. 


This is looking through one of the runners on the collector, and the bright bit at the end you see is a lightbulb that I was aiming the thing out. You can see all the way out to the end of the collector! THAT is good for flow. =)


10 January 2012

Why do I bother?

Why do I even bother trying to do crazy stuff like build my own headers or have the audacity to modify headers to try to make them better? Here's why:

New header vs. Bisi header, interesting results

The dyno chart is at the end of the video:
Dyno video

Another article that I liked:
Jack Burns, of Burns Stainless, on headers:

Particularly:
"The collector outlet diameter is the most critical dimension in the header. It's what makes the merged collector work the way it does. Each collector we sell is custom-sized to each customer's engine, and there's no real 'formula' to get a broad-based general determination for street machines. As a rule, the overwhelming majority of aftermarket headers designed for the street market have way too big of a collector outlet diameter. Most street guys are losing power because of badly designed, manufactured, or engineered street headers. There is much room for improvement here."


Something that may look similar to what I am attempting:


From this article:


The whole point is that everything I know about exhaust systems seems to point to major flaws in almost every header for the D-series I've seen, aside from very high dollar ones that are actually custom made by competent fabricators and designers. These may be the most expensive projects I've undertaken, as I've had to buy a crapload of tools, including a TIG welder just to get to the point I have. But . . . I know it is worth it. I've already learned a ton, and if anything doesn't work, I will learn from that and improve for the next round.

Learn.
Build.
Test.
Improve.

I love that stuff. 

Chris' long tube primary 4-2-1 header mockup.

These are mostly self explanatory. heh heh heh 


Some of you may wonder if this thing will clear the stock front crossmember in the CRX that it is going to be installed in. It will not. Chris has an Innovative traction bar, so it should be fine. My only concern is that I am going to have an interesting time figuring out how the )(#$(* to make these slip-fit without having a small enough expander to fit into the tubing. I am likely going to try to find some slightly larger tubing that I can cut and weld over the collector legs to make it a slip fit. We'll see what I can come up with. heh heh heh 


Almost final mock-up of Justin's header

Justin was looking at the pics of the header and requested that I tuck it to the pan more for ground clearance. His wish is my command . . . 

I took off the top two pie cuts, and started playing around with fitment, coming up with something about like this: 


Then I have to figure out how to fill the gap. I took some measurements . . . and got some ugly results. heh. I booger things up. I am, occasionally human, too, ya know. 


Even with it being ugly, the fit up is much more to Justin's requirements:


I don't have pics of it, but the first pie cut you see there is actually apiece from the original, largest cut in I made. It was very much larger than what was needed, so I simply cut a vertical slice out of the short side, and it fit very nicely with the rest of the downpipe and much better:


All together, it fits closer and is mostly acceptable to what I think it should do:


The one remaining serious issue to deal with is the gap on the back side:


I could, technically, just put a patch over that, but, I don't like the inherent volume increase, even on the backside. Even with the exhaust flow mostly pointed towards the outer wall, the increase in volume and  the shape of it won't be ideal for flow. I'm trying to improve the situation, not regress. heh I will stare it is some more today before making the final adjustment cuts to the header.

The last issue is covering up this gap from a wonky cut and using pieces that didn't originally match up:


That is really easy with using some scrap from previous cuts! 


ALMOST THERE!

08 January 2012

Monster update to bring my personal header project up to date.

So, this is going to be a ridiculous update. I am hoping to finish this project by the end of this week. What you are going to see is something really different to the Honda (car) guys are used to seeing. The motorcycle guys are used to seeing megaphones and whatnot, but maybe not some of the other stuff that I'm incorporating into these headers. 
Stack of awesome bends, transitions and cones from Columbia River Mandrel Bending:


If you EVER need bends, then buy them from CRMB. They are exactly consistent, well priced and have EXCELLENT customer service. 

Here's my cheap but actually trusty band saw: 


I like it. It's not as nice as the Milwaukee I would prefer to have, but . . . At $65 shipped, this gets the job done incredibly well. 

Capturing the scale of these parts is difficult without a frame of reference. 


The first order of business was to flap-wheel the bead left from the weld on the cones, which looks something like this:


Here I am getting the reverse (convergent) cone marked for cutting:


Here it is marked up and ready to get chopped:


Here is the setup I came up with for clamping, which worked very well:

Fit-up is pretty effing good:


That's all I needed to do for the larger megaphone. The smaller one, which is more "normal" sized needed some trimming to fit, so, here are some pics of that:


And here's a pic of the megaphone set up to see how it will look with the 2.5" tube that will get a V-band to fit the rest of the rest of the exhaust: 


Now, for some perspective and scale:


Yeah . . . the large one is insane. I wanted to go )(#*$(*#$ huge to see WTF happens. I don't think anyone has ever used one this large on a Civic or CRX. I want to see what happens. Megaphones are proven to work, so, I figure go to the extreme with one and see what happens. If it doesn't work, I can easily cut it down in increments. =)

"Bench" cleanup time:


Now we get into some of the more creative. Taking the 18* bends and making a 2-1 collector that is both precise and consistent isn't terribly easy without a shop full the proper tools, so . . . I made molds. I spaced the bends using wood spacers and using clear tape over the end of the tubes. 

Here are the molds for the two sizes of tubing I am using:


Here's the taped end I used to make the mold:


 I simply used packing tape over the end of the tube, cement in a chinese food container and time. Once the mold was dry, I just plopped the other bends into the mold, sprayed them with cheap spray paint, thanks to my friend Jesse's brilliant idea, then cut them.


 I didn't get a lot of pics of the in between stages. I got all the beds cut up, got a TIG welder, got that set up in a friend's garage (I don't have 220V access at home) and got to welding.


 Here are most of the collectors welded up:

Some closeups of the welds on the collectors:


Inside:


Not pretty, but, honestly, not bad for my first TIG work on thin metal. It cleaned up nicely enough with a die grinder. Also, not the exact fitment in the "crotch."


Keep in mind, these are the first TIG welds I laid down in YEARS. Every time I sit down to it, I get better, more comes back, I get into the rhythm faster. I'm near ready to tackle some stainless. I'm looking forward to it. 
The next step was to take the collectors and match them up to the size they need to be, thusly:

A crack developed when sizing the ends:


I'm not worried about it because I have a TIG welder. heh

I also managed to break my cheap exhaust expander trying to expand stuff. 


I was seriously pissed. There don't seem to be and good solutions for this, either.  I bought a heavier duty expander, but . . . it won't fit in the smaller tubes. I'm using 1 5/8" OD. 

This is the fit I am looking for:


Keep in mind . . . this is JUST the collector. heh heh heh


Unt Hello! Here's the collectors 90% finished: 


HUUUUUUGE! 

OH YEAH!